If you want to be a successful web developer or designer, you always have to be a step ahead. Sooner or later, HTML5 is going to strengthen its position even further and you want to be ready when that happens. Mastering the latest technology will allow you to experiment, push things further, and give you a considerable edge in the market.
For this roundup we’ve prepared 30 fresh, brilliant and useful HTML5 tutorials from 2012 ranging from basic element explanation to advanced case studies.
Your Designer Toolbox
Unlimited Downloads: 500,000+ Web Templates, Icon Sets, Themes & Design Assets

Table of Contents:
- 30 Must-See HTML5 Tutorials to Help You
- The Ultimate Roundup of Indispensable and Helpful HTML5 Tutorials
- What is HTML5? The Introduction – What Does It Offer
- Create a Custom HTML5 Audio and Video Element UI with MediaElement.js
- Using HTML5 Video The Easy Way
- How to Hack Web Design Learning Process
All the HTML5 Templates You Could Ask For

2M+ items from the worlds largest marketplace for HTML5 Templates, Themes & Design Assets. All of it can be found at Envato Market.
30 Must-See HTML5 Tutorials to Help You
You want to improve or maybe just starting to learn. Well this is your starting point. Let’s roll.
Basics
Not quite familiar with HTML5? These resources will give you a great boost to start off.
Thecodeplayer
Thecodeplayer allows you to learn HTML5/CSS3/JavaScript in a new way – watch walkthroughs of code writing and see the demo in real-time.
w3schools, removed because of W3Fools
W3schools was good resource, but now everybody is pointing how much bad advice they are giving and that they aren’t affiliated with W3C. Site we cannot trust anymore unfortunately.
Lynda
Lynda is one of the best resources that offers software training (it’s premium though). In HTML5 First Look, author James Williamson introduces the newest HTML specification, providing a high-level overview of HTML5 in its current state, how it differs from HTML4, the current level of support in various browsers and mobile devices, and how the specification might evolve in the future.
1. Creating a Mobile-First Responsive Web Design
This tutorial is going to teach you how to create an adaptive web experience that’s designed mobile-first.
2. Using semantic HTML
This article will talk about semantic HTML and explain why you should go deeper into it.
3. WebGL 2D Translation
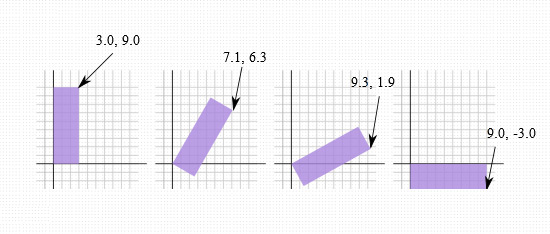
This article is a continuation of a series starting with WebGL Fundamentals. While some might find it obvious, you should check out the first chapters.
4. Getting started with the HTML5 track element
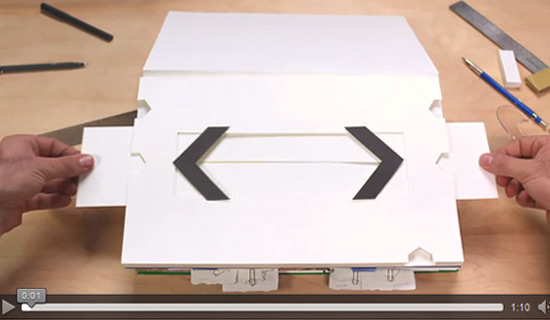
The track element provides a simple, standardized way to add subtitles, captions, screen reader descriptions and chapters to videos and audios. Learn how to use this element in this tutorial.
5. Toying With the HTML5 File System API

HTML5 provides us with a whole crop of new possibilities, such as drawing with canvas, implementing multimedia with the audio and video APIs, and so on. One of these tools, which is still relatively new, is the File System API. This tutorial goes through the basics of this new and exciting API, exploring the most common filesystem tasks.
6. Capturing Audio & Video in HTML5
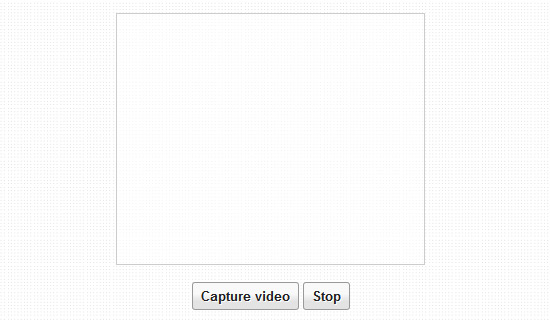
Audio/Video capture has been the “Holy Grail” of web development for a long time. For many years we’ve had to rely on browser plugins. HTML5 to the rescue.
7. An Introduction to the HTML5 Gamepad API

As HTML games begin to gradually increase in popularity, vendors are starting to introduce some exciting new APIs to make gaming that little bit sweeter. One of these is the Gamepad API, which allows you to connect your good old console gamepad into your computer and use it for browser-based games, plug and play style.
8. Understanding HTML5 and CSS3 for Web Design
HTML5 and CSS3 gives a web developer even more tools with which to express himself, here is a basic overview of what they are so you can build cutting edge websites.
9. Case Study: A Tale of An HTML5 Game with Web Audio
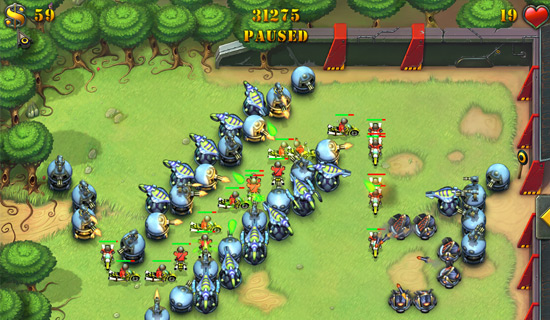
Fieldrunners is an award-winning tower-defense style game that was originally released for iPhone in 2008. Since then it has been ported to many other platforms. See how the biggest challenge of sound implementing to an HTML5 platform is achieved.
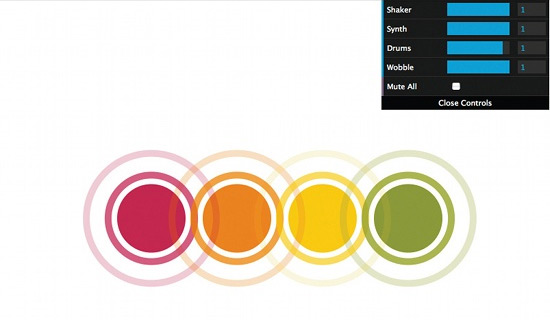
10. Case Study: Building Technitone.com
Technitone.com is a fusion of WebGL, Canvas, Web Sockets, CSS3, JavaScript, Flash, and the new Web Audio API in Chrome. This article will touch base on every aspect of production: the plan, the server, the sounds, the visuals, and some of the workflow.
11. An in Depth Analysis of HTML5 Multimedia and Accessibility
In this tutorial, you’ll learn how HTML5 helps to provide you with several ways of presenting your media content to users.
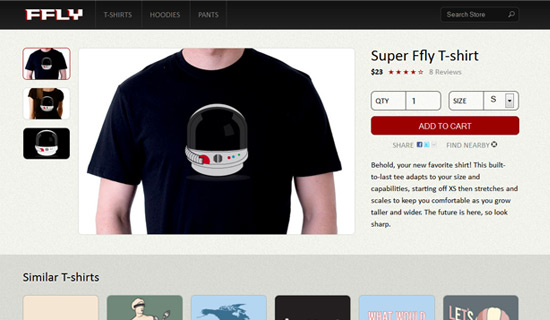
12. HTML5 Tutorial: How to Build a Single Product Page
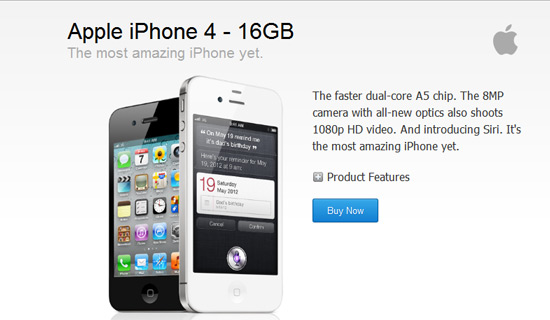
In this post, you are going to work on a fictional project, creating a single product page to offer iPhone 4S, and in this project you are also going to implement methods like:
13. Tutorial: Create A Minimal Single Page Portfolio With HTML5/CSS3
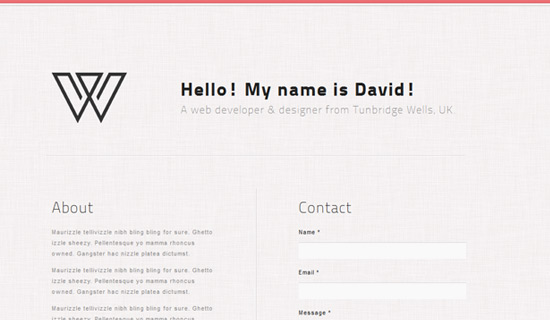
This tutorial is going to walk you through the basic front-end build and what resources were used to rapidly build the page.
14. HTML5 Drag and Drop Multiple File Uploader
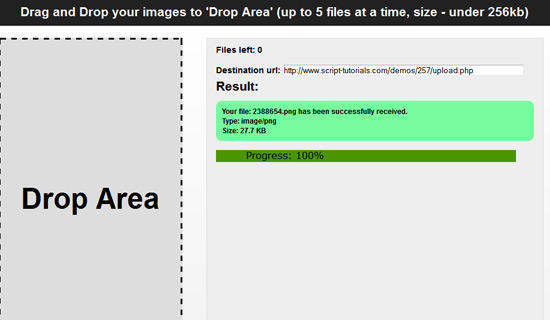
This tutorial is going to teach you how to build a multiple drag & drop file uploader (like in Flickr) in HTML5.
15. Retro shop – single page layout for your e-shop
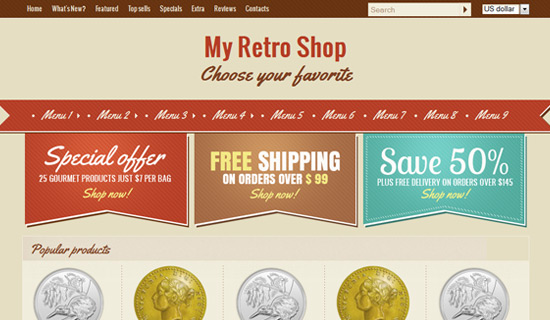
Learn how to build a retro template from scratch using HTML5/CSS/JavaScript.
16. Cocos2D HTML5 tutorial: Why it’s Hello World of course

In this tutorial you are going to implement the obligatory Hello World example using Cocos2D HTML. You can also read a tutorial on setting up Cocos2D.
17. Convert Your WordPress Theme to HTML5
After Google’s Panda Update, your site needs clearer and more human-readable code to rank better on Google. This tutorial is going to teach you how to convert your theme from XHTML to HTML5 (which Google loves).
18. Developing HTML5 Canvas Games for Facebook with JavaScript – Part 1

This tutorial describes how to create a game using the HTML5 canvas element and JavaScript, and how to integrate it into Facebook.
19. Create an interactive bubble chart with HTML5 canvas
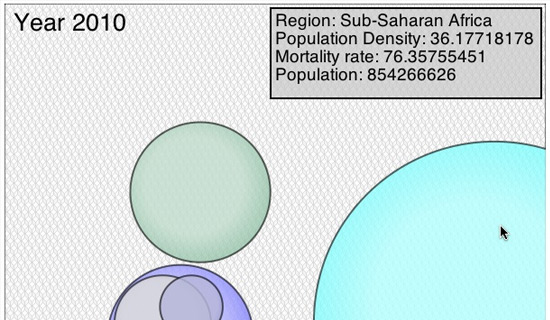
Josh Marinacci, software engineer, researcher, part-time designer, and general miscreant, explains how to use HTML5 canvas to build an interactive chart that works on desktop mobile and then populate it with real data.
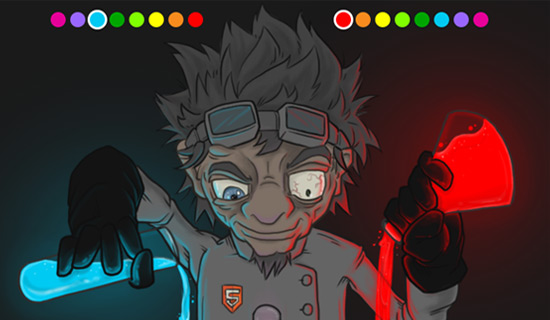
20. Create HTML5 audio visualisations
Blurring the line between Flash and HTML, Nick Jonas gives you a jump-start into audio-driven animation that runs natively in the browser.
21. Toggle Fullscreen HTML5 Canvas and Other DOM Elements

Look at some recipes used to add a fullscreen feature to the HTML5 canvas tag in browsers.
22. Mobilizing Websites with Responsive Design and HTML5 Tutorial
A blog post series tutorial for adapting your existing websites for mobile devices without building a separate mobile site. It shows, with examples, how with little changes in your HTML, CSS and JavaScript code you can deliver much nicer user experience for small screen and mobile devices.
23. Full CSS3 HTML5 Contact Form with No Images
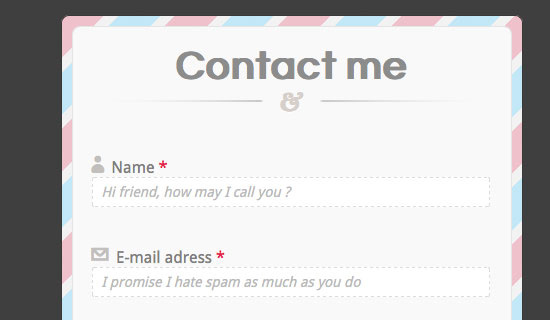
This tutorial shows a step by step guide on how to create a full HTML5 and CSS3 contact form without using any images. The purpose of tutorial is to show what you can do with this new technology, that’s why this form has some compatibility issues with old browsers.
24. Create Your Portfolio Gallery Using HTML5 Canvas

In this tutorial you will build a photo gallery and enhance it with HTML5 canvas and CSS3 transitions. The grayscale “copies” of the images are created with canvas and pure CSS3 is used for the smooth changes.
25. Build a Lightbox for a responsive HTML5 touch interface
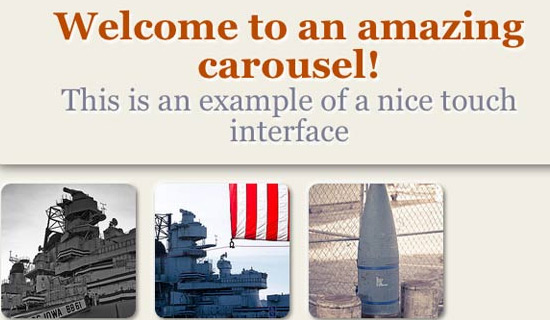
Stephen Woods, front-end engineer at Flickr, explains how to create a simple Lightbox with gesture support and provides tips for improving the perceived as well as the actual performance of touch interfaces.
26. Create an HTML5 Canvas Tile Swapping Puzzle
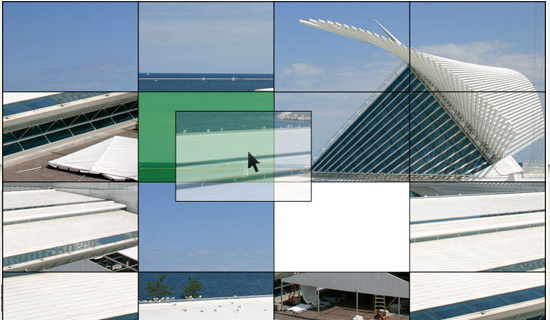
In this tutorial you will be working with the HTML5 canvas and JavaScript to create a dynamic tile swapping game. The result will be a puzzle that works with any given image, and has flexible difficulty levels that are easily adjusted.
27. HTML5 Canvas Optimization: A Practical Example
If you’ve been doing JavaScript development long enough, you’ve most likely crashed your browser a few times. The problem usually turns out to be some JavaScript bug. This tutorial focuses on optimizing animations produced using JS and HTML5
28. Learn CreateJS by Building an HTML5 Pong Game
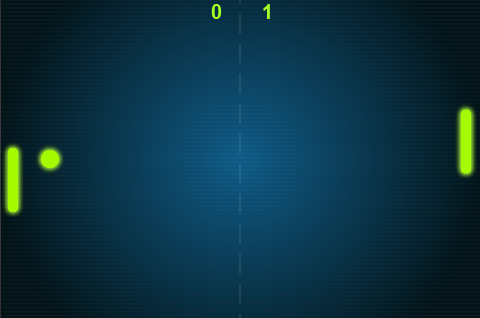
This tutorial is based on Carlos Yanez’s Create a Pong Game in HTML5 With EaselJS. The graphics and sound effects are all taken from Yanez’s tutorial.
29. How to Create an Audio Player in jQuery, HTML5 & CSS3
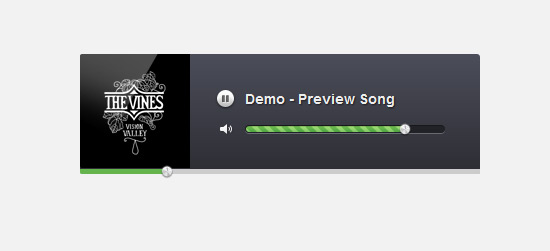
Learn how to create an HTML5 audio and video player that also works for older browsers using Flash and Silverlight to mimic the HTML5 MediaElement API.
30. Design a Foursquare-like User Profile Page in HTML5/CSS3
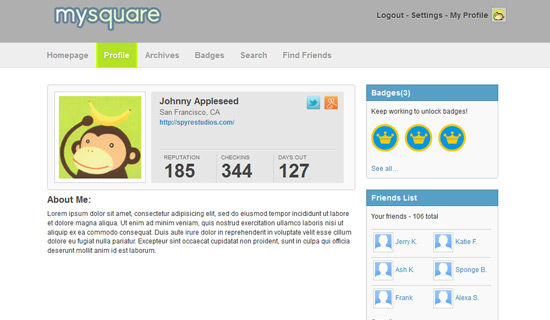
Learn how to code a simple profile page similar to that of Foursquare. You’ll be coding this page in HTML5 and CSS3, so some of the newer techniques will be introduced.
Do you have HTML5 tutorials you want to share? Feel free to share them in the comments!
As you know us, we always want to give you more, so in the next section there are some more HTML5 tutorials.
The Ultimate Roundup of Indispensable and Helpful HTML5 Tutorials
HTML5 was being developed as the next major revision of HTML (Hyper Text Markup Language), the core markup language of the World Wide Web. It attempts to solve issues found in previous iterations of HTML and addresses the needs of Web Applications, an area previously not adequately covered by HTML and it aims to reduce the need for proprietary plug-in-based rich internet application technologies such as Adobe Flash and Microsoft Silver light was successful.
New to HTML5?

We have released three e-books to help everyone learn more about HTML5, Responsive Web Design, and the current trends in web designing. If you are new to HTML5 and you want to learn more of it, then what are you waiting for? Our HTML5 e-book will teach you the basic features and elements of HTML5 to get you rolling in your next project!
Grab a copy of 1WD’s HTML5 e-book now!
HTML5 Basics
1.HTML5 for beginners

Hopefully in this article we’ll be able to amalgamate and condense a lot of this information so that anyone with basic HTML knowledge can start using it.
2.Canvas the basics of HTML5
HTML 5 canvas gives you a flexible and easy way to draw graphics using JavaScript. For each canvas element you can use a “context” (think about a page in a drawing pad), into which you can issue JavaScript commands to draw anything you want. Browsers can implement multiple canvas contexts and the different APIs provide the drawing functionality.Creating a canvas context on your page is as simple as adding the <canvas> element to your HTML, Workout this tutorial to find out how to do this.
This article takes you through the basics of implementing a 2D canvas context, and using the basic canvas functions, including lines, shape primitives, images, text, and more. You are assumed to have mastered JavaScript basics already.
3.Why HTML5 is worth your time
In this post, Meyer explains why HTML5, CSS and JavaScript are the “classic three” for developers and designers. He also pushes HTML5 features,What developers and designers need to know about HTML5, HTML5 Vs Flash comparison and Vs mobile applications.
4.When can i use it
This page tells the compatibility tables for features in HTML5, CSS3 and other upcoming web technologies.
5.HTML Presentation
This presentation describes Web development to the next level(HTML5) and other new generation technologies.
HTML5 Layouts and designs
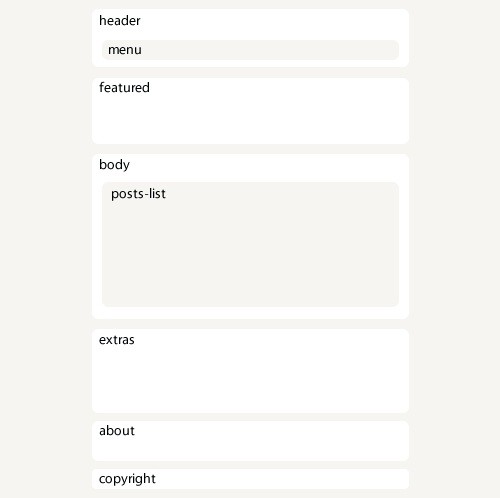
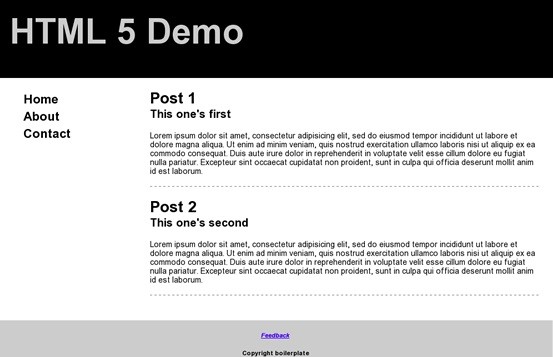
6.Basic HTML5 Layout
You can have a quick look into this basic layout of HTML 5, they have put together a very basic HTML5 page so that you can get a rough idea of starting a HTML5 layout.
7.Designing a HTML5 layout from scratch
At the end of this article you’ll learn how to Use Graceful Degradation techniques and technologies to keep things in place for legacy browsers.
Use Progressive Enhancement techniques and technologies to be up to date with the latest trends.Use HTML5 alongside a rising technology: Microformats.Have a clear vision of some of the most exciting new features HTML5 and CSS3 will bring.
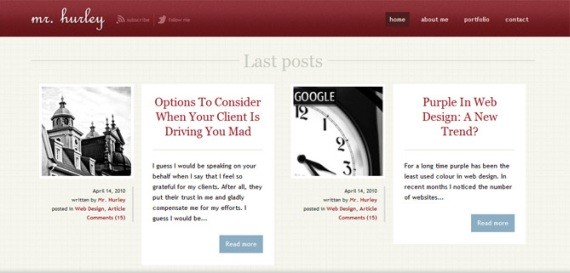
8.Designing a blog with HTML5
Much of HTML 5’s feature set involves JavaScript APIs that make it easier to develop interactive web pages but there are a slew of new elements that allow you extra semantics in your conventional Web 1.0 pages. In order to investigate these, this tutorial look at marking up a blog.
9.Simple website layout tutorial
The Most prominent additions in HTML 5 are tags like , , , , etc. HTML 5 will also include APIs for drawing graphics on screen, storing data offline, dragging and dropping, and a lot more. Site layout would be easily understandable and in code, tags are easy to understand as well Like the few tags they listed.
10.Building webpages with HTML5
However, for practical reasons (read: browser support issues) we’re going to limit this intro to just the structural tags. As cool as Canvas, offline storage, native video or the geolocation APIs are, they aren’t supported consistently across all the browsers yet.To help make some sense of what’s new in HTML 5. They’re going to dive right in and start using some of the new structural elements.
11.One page website template
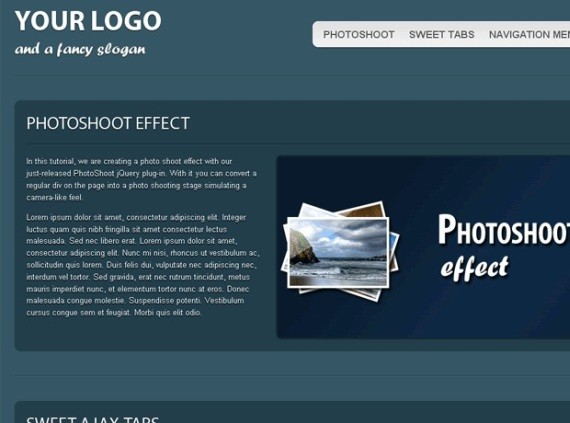
HTML5 web template, using some of the new features brought by CSS3 and jQuery, with the scrollTo plug-in. As HTML5 is still a work in progress, you can optionally download a XHTML version of the template here.
12.Create an elegant website with HTML5
In this article on Design Informer titled “Web Design Iterations And Algorithm,” Adit Gupta explains how we can approach a web design work and how a website project can be processed in a number of iterations following a main algorithm.
13.Design & code a cool iphone App website
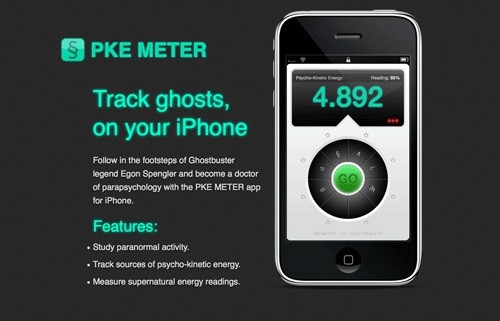
This tutorial covered the process of building an interface just like the awesome apps from Tapbots, so head over and check it out, then we’ll be ready to build an accompanying website for our PKE Meter application.
HTML5 techniques
14.HTML5 and CSS3 techniques soon using

In this tutorial, they showed how to build a blog page using next-generation techniques from HTML 5 and CSS 3. The tutorial aims to demonstrate how we will be building websites when the specifications are finalized and the browser vendors have implemented them. If you already know HTML and CSS, it should be easy to follow along.
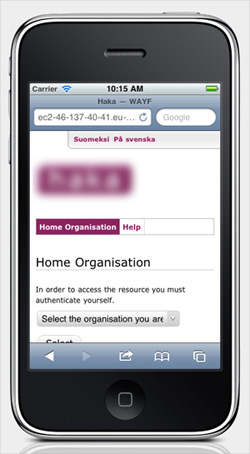
15.How to make a HTML5 iPhone application

You can create a native app that lives with all the other apps, and for the most part, it’s going to be a pitch-perfect imitation.You can do this with the skill set you probably already have: HTML(5), CSS, and JavaScript.
16.Field day with HTML5 forms
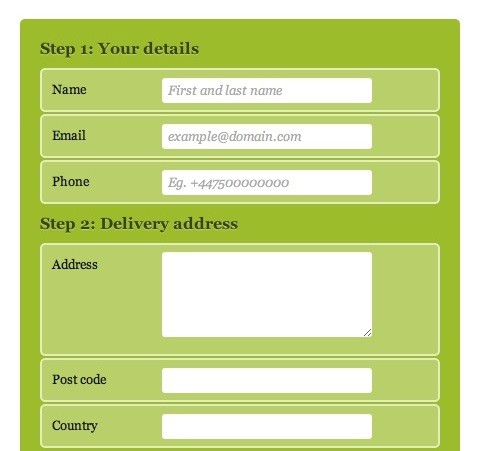
Take a look at how to style a beautiful HTML5 form using some advanced CSS and latest CSS3 techniques. I promise you will want to style your own forms after you’ve read this article.
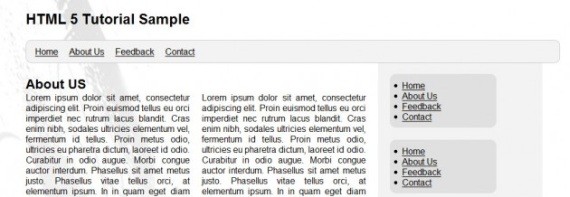
17.Browsers render even IE6
In this tutorial, they showed how to create a common layout using some of HTML 5’s new semantic elements, then use JavaScript and CSS to make our design backwards-compatible with Internet Explorer. Yes, even IE 6.
18.Drag and drop
Developers and people in general a much richer experience, we are still just scraping the surface of the new markup, so today we are going to have a look at how to create a HTML 5 page that uses the new drag and drop feature. Note we are displaying this via an iframe so if your having any trouble viewing the demo please let us know, another reason it may not show will be due to your browser, this is working in the latest Firefox browser only at the moment.
19.Websockets interact with proxy servers
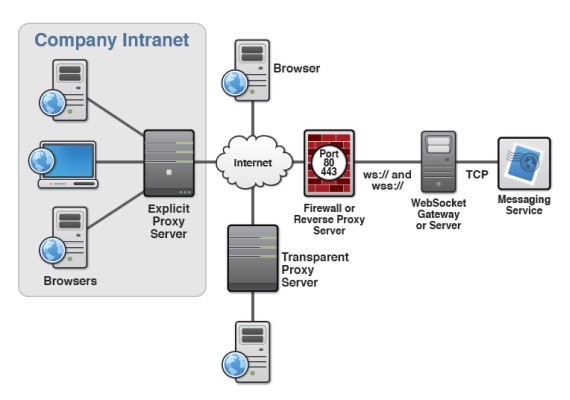
How HTML5 Web Sockets interact with proxy servers, load balancing routers, and firewalls. Additionally, they explained here Web Socket Gateway and its Web Socket emulation can add additional value.
20.CSS code structure for HTML5
This post illustrate some useful guidelines about how to implement a well organized CSS code structure in view of introduction of HTML 5 markup language. They are not general rules but simple suggestions you can follow in order to improve the readability, manageability, and general organization of CSS code. These suggestions are especially useful if you have to work on complex CSS files that otherwise can be difficult to manage.
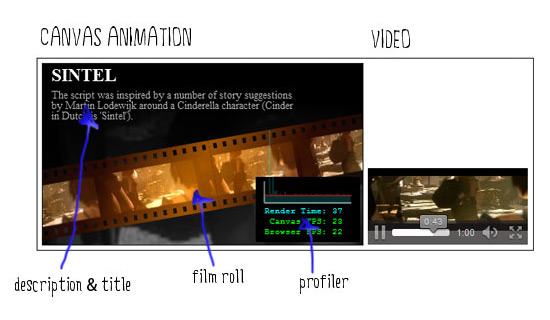
21.Blowing up HTML5 video

The tutorial is about blowing up HTML5 video and mapping it into 3D space
video Tutorials
22.Comprehensive video tutorial on HTML5
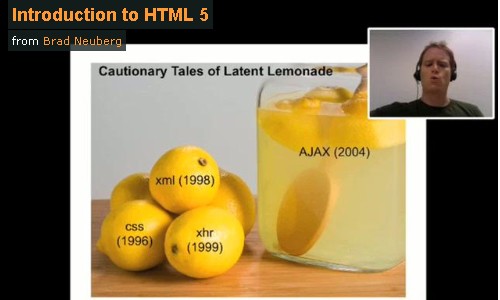
This is an old video put up by a Google Employee called Brad Neuberg as an educational Introduction to HTML5. This is for the people who don’t find time to keep up with HTML5 developments by reading up articles.
23.HTML5+CSS3 = Awesome
HTML5 Cheatsheets
- HTML5 cheat sheets on PDF
- Visual cheat sheet by woork
- Pocketbook
- HTML5 id/class name cheatsheet
Useful resources of HTML5
- http://diveintohtml5.org/
- http://www.modernizr.com/
- http://www.findmebyip.com/litmus/
In the next section we are going to show you a proper introduction to HTML5. Ready? Alright!
What is HTML5? The Introduction – What Does It Offer
In this article we will give you an insight to what is HTML5 and it’s basics, resources and more. After analysing our new focus here at 1WD, which basically is teaching new, young, designers about web design and helping them improve their skills and to start in the business, we realized that we really need to go as deep as possible into the basics.
What Is HTML5?
HTML5 is the newest hyper text markup language for websites from the World Wide Web Consortium (W3C). The first draft was made public in 2008, but not much happened until 2011. In 2011, HTML5 was released and people started writing about it and using it, but the support in different browsers was still poor. Today all major browsers (Chrome, Safari, Firefox, Opera, IE) offer HTML5 support, therefore the newest HTML technology can be used at its best today.
The official logo of HTML5
HTML5 works with CSS3 and is still in development. W3C plans to release a stable version next year, but it still looks like this is a long shot. Since its release, HTML5 has been in continuous development, with the W3C adding more and more impressive features, therefore it seems quite unlikely that HTML5’s development will end soon, which is not necessarily a bad thing.
HTML5 is the successor of HTML 4.01, released for the first time in 1999. The internet has changed significantly since 1999 and it seemed like the creation of HTML5 was necessary. The new markup language was developed based on pre-set standards:
- New features should be based on HTML, CSS, DOM, and JavaScript.
- The need for external plugins (like Flash) needs to be reduced.
- Error handling should be easier than in previous versions.
- Scripting has to be replaced by more markup.
- HTML5 should be device-independent.
- The development process should be visible to the public.
What’s new?
HTML5 was created to make the coding process easier and more logical. You will see a bit later that many syntaxes are now deprecated and soon to be kicked out through the back door. The unique and impressive features HTML5 comes with are in the multimedia department. Many of the features it comes with have been created with the consideration that users should be able to run heavy content on low-powered devices. The syntactic features include the new <video>, <audio> and <canvas> elements, but also integration of vector graphics content (what we knew before as being the <object> tags). This means that multimedia and graphic content on the web will be handled and executed easier and faster, without the need of plugins or APIs.
There are a bunchload of new syntaxes added, but below I will name and describe the most important. The rest of them can always be found in Web Reference’s HTML5 section.
- <article> – this tag defines an article, a user comment or a post, so an independent item of content
- <aside> – the aside tag marks content aside from the page content, which for example could be a lateral sidebar
- <header>, <footer> – you won’t need to manually name IDs for headers and footers, as now you have a pre-defined tag for them
- <nav> – the navigation can now be placed in the markup in between the nav tags, which will automatically make your lists act like navigation
- <section> – this is another important new syntax, as it can define any kind of sections in your document. It works pretty much like a div which separates different sections.
- <audio>, <video> – these two obviously mark sound or video content, which will now be easier to run by devices.
- <embed> – this new tag defines a container for interactive content (plugin) or external application
- <canvas> – the canvas tag is quite exciting, as it allows drawing graphics via scripting (mostly JavaScript, but some others can be employed as well)
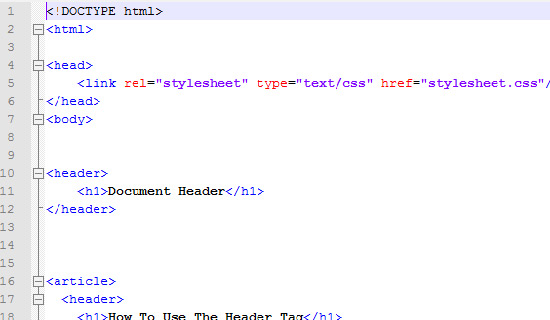
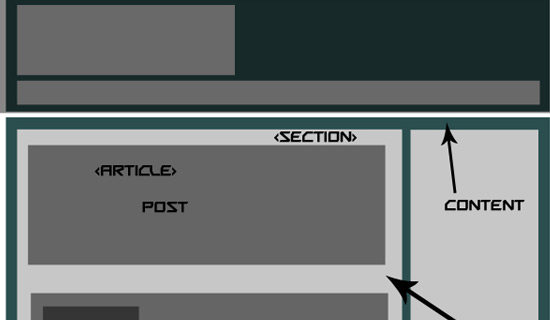
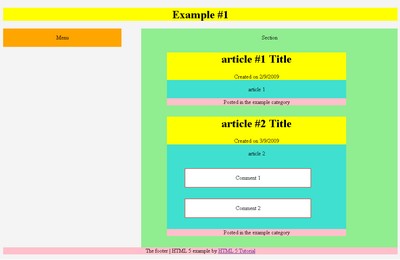
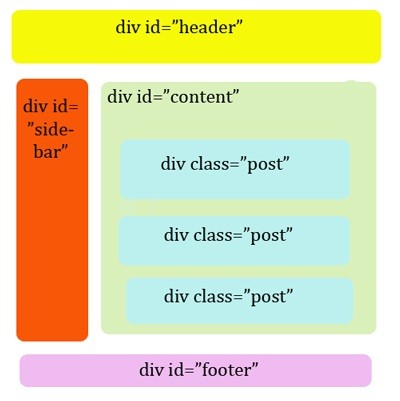
What is important to remember is that the new HTML5 tags do not always work as the ones before. For example, the header and footer tags will not only mark the start and the end of a page, but also the start and the end of each section you have. This means that these two tags are likely to be used more than once in the whole page. In the illustration below can you see what I mean.
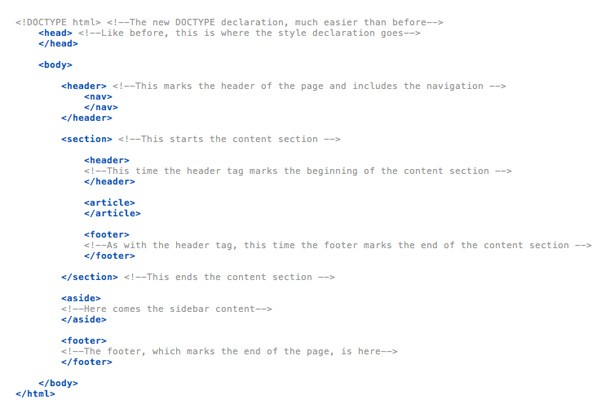
Example of how HTML5 code looks like
Oh yes, and the DOCTYPE declaration finally makes some sense. Or, at least, this time it is much simpler than before and it is very easy for us to remember and we won’t have to search for it on the web or copy it from site to site. <!DOCTYPE html> closed by </html> at the end of the page is something we waited for for a long time to come and now it finally is here.
Moreover, complex XHTML declarations many of us used before can now be replaced with <html lang=”en”> and long encoding declarations can simply be written in this way: <meta charset=”utf-8″>. Can it get simpler than that? It most definitely can’t.
The following tags from HTML 4.01 are now removed from HTML5, therefore browsers do not offer support for them anymore. This means that it is a good idea to go back to your HTML pages and check for them, as they might disrupt the design in the latest browsers.
- <acronym>
- <applet>
- <basefont>
- <big>
- <center>
- <dir>
- <font>
- <frame>
- <frameset>
- <noframes>
- <strike>
- <tt>
Things to know about HTML5
It is crucial to remember that HTML5 is built on the success of its previous version, HTML 4.01, which is undoubtedly the best version ever. In order to be better at using HTML5 you do not need to forget everything about the previous version. You are not learning a totally new language here. Keep your beloved syntaxes and keep the way you used to format your code, only remember that now you need to build upon the coding skills you already have.
In case you have absolutely no knowledge of HTML and you want to start now, I advise you to start with HTML 4.01 and only when you master it move onto HTML5. Starting with the latest version is like learning to run before learning to walk – which is impossible as far as I know. HTML 4.01 still contains the basics of HTML5, therefore in my opinion you should have strong knowledge of former HTML versions in order to be able to master HTML5.
The upside of learning HTML5 now is that the new markup language works right away. You can basically do whatever you want with it today – and it is supported in all major browsers. From video to geolocation, local storage and microdata annotations, HTML5 is something we need to start using. If you are in the design business, sticking with HTML 4.01 is a mistake, because everybody will move on while you will remain behind.
HTML5 is definitely here to stay. It is created to sustain today’s necessities and especially because it is in continuous development, it will be able to sustain the changes that will happen in the industry for quite some time. One of the reasons behind HTML5 taking so much time to develop is because the W3C had to analyze lots of factors and think of the future. They took their time and finally delivered something that can easily be labelled as a high-quality product.
Examples
In order to show you how far HTML5 actually got, I will showcase some websites and applications made with the new markup language, so you can see how much you can actually do with it.
1. Read is a HTML5 responsive theme made for WordPress. It is minimalistic, very simple to understand and use, loads faster than ever and it is not expensive at all.

2. SmartStart is another incredibly simple to use HTML5 template.

3. BIZfolio is also made with HTML5, but it is not a simple template or a WordPress theme. BIZfolio is developed so that it works with Drupal.

4. We start looking at applications by showcasing this simple Poker Blind Timer made with HTML5

5. Coolendar is a great calendar application developed with HTML5, which can be both found for computer and portable devices (Android and iOS).

6. Scribd is built with HTML5 and allows users to have easy and quick access to different files and documents other users upload.
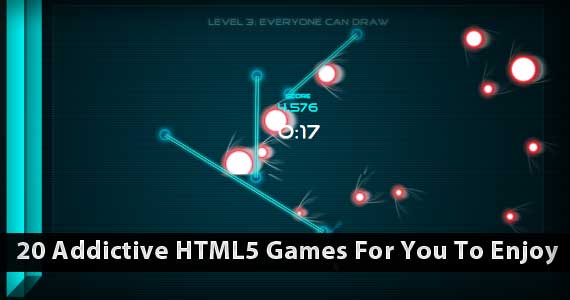
Besides websites and applications, developers created games based only on HTML5, instead of Flash as it was before. Here are some addictive HTML5 games out there. Check it out, some of the games are really entertaining.
Where to start?
HTML5 can’t be taught in a brief introduction. There are two ways to learn it as I see it. Either grab a good HTML5 book, or go out there and actually do it. I recommend both. I myself learned HTML and CSS from the internet, but there is some valuable information that you can get through reading a book and there is some valuable information that you can only get by practising If you already have a solid understanding of HTML 4.01, it shouldn’t take more than a week or two to grab the necessary HTML5 skills from a book. And then the world is yours, you can go out there and practice.
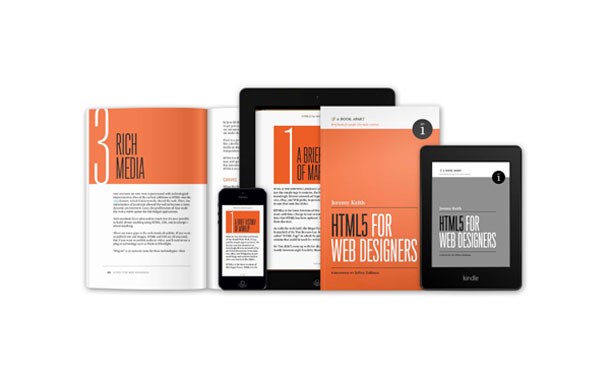
Jeremy Keith’s HTML5 book on several devices
To help you even more, I gathered a collection of good and respected books and tutorials you can start reading. I hope that by the time I will start posting tutorials, more of you will be able to code in HTML5 than in HTML 4.01. So this is where to start guys:
Books
- HTML5 for web designers by Jeremy Keith
- HTML & CSS: Design and Build Web Sites, Jon Duckett
- The Definitive Guide to HTML5, Adam Freeman
- HTML5 in easy steps, Mike McGrath
- Responsive Web Design with HTML5 and CSS3, Ben Frain
Guides and tutorials
- No better way to learn about HTML5 than from the guys who created it, so there you go. Here you have the W3C HTML5 Introduction.
- Introduction to HTML
- Semantics of HTML5
1WD’s HTML5 Book
Check out our eBook now!
Update, here it is: Create a Responsive Website Using HTML5 and CSS3 – Video Tutorial
Next up is one of our own tutorial with the addition of jQuery.
Create a Custom HTML5 Audio and Video Element UI with MediaElement.js
There are a lot of things you can create with custom HTML5. The new elements make it possible to simplify things as opposed in the past that you need to add CSS to make it work or display.
Two of the good examples are the audio and video elements. Although the audio and video element have a generic look, it can be customized using a jQuery plugin called MediaElement.js.
In today’s tutorial, you will code an audio and video player using the UI toolkits made by Rudolph Musngi, CSS3 to style the elements and the MediaElement.js for the functionalities.
OK, let’s start.
Resources You Need to Complete This Tutorial
- UI Toolkits by Rudolph Musngi
- jQuery Library (You can use the download version or Google’s Hosted Library)
- MediaElement.js
- Time and Patience
Custom Audio Player

[demo source=”https://1stwebdesigner.com/demos/player-demo-final.zip” demo=”https://1stwebdesigner.com/demos/player-demo/audio.html”]
Step 1 – Download jQuery library and MediaElement.js
To make all things work, you need to download, first, the jQuery Library or use Google’s Hosted Library.
Then, you also need the MediaElement.js script and extract it on your preferred location. Inside the folder of the extracted MediaElement.js, you need the following files:
- mediaelement-and-player.min.js
- flashmediaelement.swf
- silverlightmediaelement.xap
Step 2 – Adding Necessary Links on the Head Section
To start, you need to add the following links to the Head Section. This includes the links to the CSS files, jQuery library and MediaElement.js.
&amp;lt;!DOCTYPE html&amp;gt;
&amp;lt;html lang=&amp;quot;en-US&amp;quot;&amp;gt;
&amp;lt;head&amp;gt;
&amp;lt;meta charset=&amp;quot;utf-8&amp;quot;&amp;gt;
&amp;lt;title&amp;gt;Creating a Custom HTML5 Audio and Video Element UI with
MediaElement.js&amp;lt;/title&amp;gt;
&amp;lt;link href=&amp;quot;css/normalize.css&amp;quot; rel=&amp;quot;stylesheet&amp;quot; type=&amp;quot;text/css&amp;quot;&amp;gt;
&amp;lt;link href=&amp;quot;css/style.css&amp;quot; rel=&amp;quot;stylesheet&amp;quot; type=&amp;quot;text/css&amp;quot;&amp;gt;
&amp;lt;link href=&amp;quot;css/audio.css&amp;quot; rel=&amp;quot;stylesheet&amp;quot; type=&amp;quot;text/css&amp;quot;&amp;gt;
&amp;lt;script src=&amp;quot;js/jquery-1.11.1.min.js&amp;quot; type=&amp;quot;text/javascript&amp;quot;&amp;gt;&amp;lt;/script&amp;gt;
&amp;lt;script src=&amp;quot;js/mediaelement-and-player.min.js&amp;quot; type=&amp;quot;text/javascript&amp;quot;&amp;gt;&amp;lt;/script&amp;gt;
&amp;lt;/head&amp;gt;
Step 3 – The Markup
Now, create the div that will hold the audio element. You will give it a class of audio-player and inside it, you will put a paragraph element for the title and the audio element itself.
&amp;lt;div class=&amp;quot;audio-player&amp;quot;&amp;gt;
&amp;lt;p&amp;gt;Michael Buble - Everything&amp;lt;/p&amp;gt;
&amp;lt;audio id=&amp;quot;audio-player&amp;quot; src=&amp;quot;restheces/Michael Buble - Everything.mp3&amp;quot; type=&amp;quot;audio/mp3&amp;quot; controls=&amp;quot;controls&amp;quot;&amp;gt;&amp;lt;/audio&amp;gt;
&amp;lt;/div&amp;gt;
Step 4 – The Script
Now that you had set up the audio markup, you need to add the code below before the ending of the tag.
Notice that you selected the class audio-player that you used to wrap the audio elements. These are the basic settings set for this tutorial; you can check out the mediaelement.js documentation to learn more about the available settings.
$(document).ready(function() {
    	$('#audio-player').mediaelementplayer({
        	alwaysShowControls: true,
        	features: ['playpause','volume','progress'],
        	audioVolume: 'horizontal',
        	audioWidth: 364,
   	     audioHeight: 70
    	});
	});
Step 5 – The CSS
Next, set up the styles of the custom audio player. First, add some reset styles to make sure that there are no other extra styles on each browser.
.audio-player,.audio-player div,.audio-player p,.audio-player a,.audio-player button {
	margin: 0;
	padding: 0;
	border: none;
	outline: none;
}
Then, style the player container and add the width a height on it and style the paragraph tag for the title.
.audio-player {
	position: relative;
    margin: 0 auto;
    background: #d14242;
	width: 426px;
    height: 120px;
}

.audio-player p {
    position: absolute;
    text-align: center;
    text-transform: uppercase;
	left: 143px;
	top: 62px;
    font-family: 'Open Sans', sans-serif;
    font-weight: 700;
    font-size: 17px;
	color: #fcc;
    font-weight: 700;
}
Next, style the play-pause button. This will be in a form of png sprite image and manipulated using the background-position.
.mejs-controls .mejs-button button {
    position: absolute;
    display: block;
	width: 73px;
    height: 71px;
	cursor: pointer;
    background: #961717;
}

.mejs-controls .mejs-play button,.mejs-controls .mejs-pause button {
	width: 115px;
    height: 120px;
    background: #961717 url(../img/playerbuttons.png) 0 0 no-repeat;
}

.mejs-controls .mejs-pause button {
    background-position: 0 -120px;
}
For the Mute and Unmute Control button, use a png sprite image and manipulate the background-position to display each part.
.mejs-controls .mejs-mute button,.mejs-controls .mejs-unmute button {
	width: 24px;
    height: 23px;
    background: transparent url(../img/mute-unmute.png) 0 0;
	top: 28px;
	left: 140px;
}

.mejs-controls .mejs-unmute button {
    background-position: 0 -23px;
}
Now, add the following styles for the volume slider. Notice that instead of using an image for the circle icon, CSS3 was used instead using the border-radius property.
.mejs-controls div.mejs-horizontal-volume-slider {
    position: absolute;
	top: 33px;
	right: 23px;
    cursor: pointer;
}

.mejs-controls .mejs-horizontal-volume-slider .mejs-horizontal-volume-total {
	width: 232px;
    height: 8px;
    background: #961717;
	-webkit-border-radius: 4px;
    -moz-border-radius: 4px;
    border-radius: 4px;
}

.mejs-controls .mejs-horizontal-volume-slider .mejs-horizontal-volume-current {
    position: absolute;
	width: 0;
    height: 8px;
    background: #961717;
	top: 1px;
	left: 1px;
    -webkit-border-radius: 8px;
    -moz-border-radius: 8px;
    border-radius: 8px;
}
The CSS codes below will set the background color and dimension of the time loaded and current time.
.mejs-controls div.mejs-time-rail {
	width: 380px;
}

.mejs-controls .mejs-time-rail span {
    position: absolute;
    display: block;
	width: 380px;
    height: 12px;
	top: 40px;
	left: 55px;
    cursor: pointer;
    -webkit-border-radius: 0 0 2px 2px;
    -moz-border-radius: 0 0 2px 2px;
    border-radius: 0 0 2px 2px;
}

.mejs-controls .mejs-time-rail .mejs-time-total {
    background: #e26060;
	width: 311px !important;
    height: 12px;
    margin-top: 68px;
    margin-left: 60px;
}

.mejs-controls .mejs-time-rail .mejs-time-loaded {
	top: 0;
	left: 0;
	width: 0;
    background: #961717;
}

.mejs-controls .mejs-time-rail .mejs-time-current {
	top: 0;
	left: 0;
	width: 0;
    background: #961717;
}
Next, add some styles for the time and volume sliders (handle).
.mejs-controls .mejs-time-rail .mejs-time-handle {
    position: absolute;
    display: block;
	width: 10px;
    height: 10px;
	top: 2px;
    background: #330202;
    -webkit-border-radius: 50%;
    -moz-border-radius: 50%;
    border-radius: 50%;
	left: 11px;
}

.mejs-controls .mejs-horizontal-volume-slider .mejs-horizontal-volume-handle {
    position: absolute;
    display: block;
	width: 12px;
    height: 12px;
    -webkit-border-radius: 50%;
	top: -2px;
    background: #330202;
}
Finally, add the styles for the Time Progress Bar tooltip. This will appear when you hover over the progress bar.
.mejs-controls .mejs-time-rail .mejs-time-float {
position: absolute;
z-index: 9999;
color: fff;
width: 33px;
height: 23px;
top: -26px;
display: none;
margin-left: -17px;
}
.mejs-controls .mejs-time-rail .mejs-time-float-current {
width: 33px;
display: block;
left: 0;
top: 4px;
font-family: 'Open Sans', sans-serif;
font-size: 10px;
font-weight: 700;
color: #f89494;
text-align: center;
z-index: 9999;
background: #bf3737;
padding: 2px 2px 5px;
}
.mejs-controls .mejs-time-rail .mejs-time-float-current:after {
content: &amp;quot;&amp;quot;;
position: absolute;
width: 0;
height: 0;
border-width: 10px;
border-style: solid;
border-color: #bf3737 transparent transparent;
top: 15px;
left: 8px;
}
And that’s really it! Now that you’re done on the custom audio element. On the next part of this tutorial, you will create a custom video element.
Custom Video Player

Step 1 – Download jQuery library and MediaElement.js
Just like the custom audio element, you need to download first the jQuery library or use Google’s Hosted Library.
Then, you also need the MediaElement.js script and extract it.
The same with the custom audio element, you will again use following files inside the MediaElement.js folder:
- mediaelement-and-player.min.js
- flashmediaelement.swf
- silverlightmediaelement.xap
Step 2 – Adding Necessary Links on the Head Section
Afterwards, you will add the following links to the head section. This will again include the links to the CSS files, jQuery library and MediaElement.js.
&amp;lt;!DOCTYPE html&amp;gt;
&amp;lt;html lang=&amp;quot;en-US&amp;quot;&amp;gt;
&amp;lt;head&amp;gt;
&amp;lt;meta charset=&amp;quot;utf-8&amp;quot;&amp;gt;
&amp;lt;title&amp;gt;Creating a Custom HTML5 Audio and Video Element UI with
MediaElement.js&amp;lt;/title&amp;gt;
&amp;lt;link href=&amp;quot;css/normalize.css&amp;quot; rel=&amp;quot;stylesheet&amp;quot; type=&amp;quot;text/css&amp;quot;&amp;gt;
&amp;lt;link href=&amp;quot;css/style.css&amp;quot; rel=&amp;quot;stylesheet&amp;quot; type=&amp;quot;text/css&amp;quot;&amp;gt;
&amp;lt;link href=&amp;quot;css/video.css&amp;quot; rel=&amp;quot;stylesheet&amp;quot; type=&amp;quot;text/css&amp;quot;&amp;gt;
&amp;lt;script src=&amp;quot;js/jquery-1.11.1.min.js&amp;quot; type=&amp;quot;text/javascript&amp;quot;&amp;gt;&amp;lt;/script&amp;gt;
&amp;lt;script src=&amp;quot;js/mediaelement-and-player.min.js&amp;quot; type=&amp;quot;text/javascript&amp;quot;&amp;gt;&amp;lt;/script&amp;gt;
&amp;lt;/head&amp;gt;
Step 3 – The Markup
Now create the div that will hold the video element. You will wrap the video element in a class of video-player.
&amp;lt;div class=&amp;quot;video-player&amp;quot;&amp;gt; &amp;lt;video width=&amp;quot;490&amp;quot; height=&amp;quot;276&amp;quot; poster=&amp;quot;img/video-poster.jpg&amp;quot;&amp;gt; &amp;lt;video src=&amp;quot;resources/Pedestrian.mp4&amp;quot; type=&amp;quot;video/mp4&amp;quot;&amp;gt; &amp;lt;/video&amp;gt; &amp;lt;/div&amp;gt;
Step 4 – The Script
Now that you have the markup set up, add the code for the video controls and settings. Notice that you selected the video element and then used the following settings:
- alwaysShowControls – This will display or hide the video controls using the true or false value.
- videoVolume – This will display the volume slider horizontal.
- features: [‘playpause’,’progress’,’volume’,’fullscreen’] – This set up the control for the video.
For this part, you will use the following settings but you can configure more settings by checking out MediaElement.js documentation page.
$(document).ready(function() {
    $('video').mediaelementplayer({
        alwaysShowControls: false,
        videoVolume: 'horizontal',
        features: ['playpause', 'progress', 'volume', 'fullscreen']
    });
});
Step 5 – The CSS
For the CSS, start by adding reset and basic styles to the elements.
.mejs-inner,.mejs-inner div,.mejs-inner a,.mejs-inner span,.mejs-inner button {
	margin: 0;
	padding: 0;
	border: none;
	outline: none;
}

/* General Styles */
.mejs-container {
	position: relative;
	background: #000;
}

.mejs-inner {
	position: relative;
	width: inherit;
	height: inherit;
}

.me-plugin {
	position: absolute;
}

.mejs-container-fullscreen .mejs-mediaelement,.mejs-container-fullscreen video,.mejs-embed,.mejs-embed body,.mejs-mediaelement {
	width: 100%;
	height: 100%;
}

.mejs-embed,.mejs-embed body {
	margin: 0;
	padding: 0;
	overflow: hidden;
}

.mejs-container-fullscreen {
	position: fixed;
	overflow: hidden;
	z-index: 1000;
	left: 0;
	top: 0;
	right: 0;
	bottom: 0;
}

.mejs-poster img {
	display: block;
}

.mejs-background,.mejs-mediaelement,.mejs-poster,.mejs-overlay {
	position: absolute;
	top: 0;
	left: 0;
}

.mejs-overlay-play {
	cursor: pointer;
}

.mejs-inner .mejs-overlay-button {
	position: absolute;
	top: 50%;
	left: 50%;
	margin-left: -82px;
	width: 158px;
	height: 158px;
	background: url(../img/playbutton.png) no-repeat;
}
Next, you will style the controls. The container will have a width of 100% and a position of absolute. You will use a png sprite image for the play and pause button and manipulate the display of each element using the background-position property.
.mejs-container .mejs-controls {
left: 0;
bottom: 0;
background: #c94745;
position: absolute;
width: 100%;
height: 15px;
}
/* Controls Buttons */
.mejs-controls .mejs-button button {
display: block;
cursor: pointer;
margin-top: -8px;
margin-left: -6px;
width: 6px;
height: 9px;
background: transparent url(../img/play_pause.png);
}
/* Play &amp;amp; Pause Button */
.mejs-controls div.mejs-playpause-button {
position: absolute;
top: 12px;
left: 15px;
}
.mejs-controls .mejs-play button,.mejs-controls .mejs-pause button {
width: 6px;
height: 9px;
background-position: 0 0;
}
.mejs-controls .mejs-pause button {
background-position: 0 -9px;
}
For this part of the CSS, let’s style the Mute and Unmute buttons. Again, you will use a png sprite image and manipulate its display position using background-position.
.mejs-controls div.mejs-volume-button {
    position: absolute;
	top: 12px;
	left: 45px;
}

.mejs-controls .mejs-mute button,.mejs-controls .mejs-unmute button {
	width: 11px;
    height: 11px;
    background: url(../img/mute_unmute.png)no-repeat;
    background-position: 0 0;
    margin-left: -14px;
    margin-top: -9px;
}

.mejs-controls .mejs-unmute button {
    background-position: 0 -12px;
}
Now, add some styles to the Full or Window Screen button. Similar with the play and pause button, for the Mute and Unmute button, you will use a png sprite image file to display each side of the full or window screen element.
.mejs-controls div.mejs-fullscreen-button {
	position: absolute;
	top: 7px;
	right: 7px;
}

.mejs-controls .mejs-fullscreen-button button,.mejs-controls .mejs-unfullscreen button {
	width: 10px;
	height: 10px;
	margin-top: -4px;
	cursor: pointer;
	background: url(../img/window_screen.png)no-repeat;
}

.mejs-controls .mejs-unfullscreen button {
	background-position: 0 -12px;
}
Self-explanatory, instead of setting up a pure background width element, you will set it up on an absolute positioning.
.mejs-controls div.mejs-horizontal-volume-slider {
	position: absolute;
	cursor: pointer;
	top: 6px;
	left: 47px;
}

.mejs-controls .mejs-horizontal-volume-slider .mejs-horizontal-volume-total {
	width: 60px;
	background: #330202;
}

.mejs-controls .mejs-horizontal-volume-slider .mejs-horizontal-volume-current {
	position: absolute;
	width: 0;
	top: 0;
	left: 0;
}

.mejs-controls .mejs-horizontal-volume-slider .mejs-horizontal-volume-total,.mejs-controls .mejs-horizontal-volume-slider .mejs-horizontal-volume-current {
	height: 4px;
}
The Progress Bar will have basic styles. The loading rail has an extra feature with a class .mejs-time-loaded. This will display how much time the video file has been pre-loaded via streaming downloads.
.mejs-controls div.mejs-time-rail {
	position: absolute;
	top: -10px;
	height: 9px;
	width: 100%;
	left: 0;
}

.mejs-controls .mejs-time-rail span {
	position: absolute;
	display: block;
	cursor: pointer;
	width: 100%;
	height: 10px;
	top: 0;
	left: 0;
}

.mejs-controls .mejs-time-rail .mejs-time-total {
	background: #ef3a3a;
}

.mejs-controls .mejs-time-rail .mejs-time-loaded {
	background: #630909;
}

.mejs-controls .mejs-time-rail .mejs-time-current {
	width: 0;
}
For the progress bar handle, you will simply create a small circle using the border-radius property with a background color of #ef3a3a.
.mejs-controls .mejs-time-rail .mejs-time-handle {
	position: absolute;
	cursor: pointer;
	width: 10px;
	height: 10px;
	top: 0;
	-webkit-border-radius: 50%;
	-moz-border-radius: 50%;
	border-radius: 50%;
	background: #ef3a3a;
}
Next, you will style the tool tip that will show the current time on hover state. You will use basic CSS for this with the :after selector to create a small triangle pointing downward.
.mejs-controls .mejs-time-rail .mejs-time-float {
position: absolute;
display: none;
width: 33px;
height: 23px;
top: -26px;
margin-left: -17px;
}
.mejs-controls .mejs-time-rail .mejs-time-float-current {
width: 33px;
display: block;
left: 4px;
top: 4px;
font-family: 'Open Sans', sans-serif;
font-size: 10px;
font-youight: 700;
color: #f89494;
text-align: center;
z-index: 9999;
background: #bf3737;
padding: 2px 2px 5px;
}
.mejs-controls .mejs-time-rail .mejs-time-float-current:after {
content: &amp;quot;&amp;quot;;
position: absolute;
width: 0;
height: 0;
border-width: 10px;
border-style: solid;
border-color: #bf3737 transparent transparent;
top: 13px;
left: 8px;
}
.mejs-controls .mejs-time-rail .mejs-time-float-corner {
display: none;
}
Finally, you will set up the background color of the Progress and Volume Bar.
.mejs-controls .mejs-time-rail .mejs-time-current,.mejs-controls .mejs-horizontal-volume-slider .mejs-horizontal-volume-current {
	background: #7c0f0f;
}
Wrapping Up
There you have it! I hope you learned something from this tutorial, and turn the audio and video players into a fantastic modern design.
This can be done using pure CSS3 styles but it still has poor support, especially on the Jurassic browsers like Internet Explorer 8 and its older versions. The best way to go is to use JavaScript like this MediaElement.js plugin.
Feel free to use these codes on your projects. Let me know about your thoughts regarding this tutorial on the comment section. And make sure to check out our YouTube channel by clicking here.
Now let’s take a look at video feature of HTML5 and how to use with ease.
Using HTML5 Video The Easy Way
f you haven’t had a good reason to learn HTML5 video, let me give you one: Flash mobile is dead. Mobile is the new black. So more then using CSS media queries and cool coding tricks, you need to be ready to switch also the way you post videos online.
Now you may be asking yourself if it’s hard to implement HTML5 video, or if it’s worth the effort. Well, dear friend, it’s way easier than you think.
We’ll see today a few different ways you can implement it, and a few more things that you should be aware of.
So, let’s rock!
How <video> tag works
Before HTML5 we used <embed> or <object> tags to do this stuff. Don’t know if you’ve had the pleasure of trying to get this working, but I can assure you, it can cause quite the headache.
As you may notice, they are using external sources to process this content. External sources mean plugins, and they’re not always 100% compatible with your default content (how many times have you seen a flash banner above content that it shouldn’t be?).
The video tag is quite simple, you’ll show it which sources it can use, and if it can’t read these sources it’ll show your alternative message:
&lt;video width=&quot;320&quot; height=&quot;240&quot; controls=&quot;controls&quot;&gt; &lt;source src=&quot;movie.mp4&quot; type=&quot;video/mp4&quot; /&gt; &lt;source src=&quot;movie.ogg&quot; type=&quot;video/ogg&quot; /&gt; &lt;source src=&quot;movie.webm&quot; type=&quot;video/webm&quot; /&gt; Bad news, you can't see the amazing stuff that is here. &lt;/video&gt;
Here you’ll need sources as .mp4, .mp3, .ogg, .webm., and if you don’t have any of these formats there are a lot of html5 video converters out there for you to use.
You’ll need different file types because Firefox (3.5+), Opera(10.5+) and Chrome(5.0+) support .ogg but Internet explorer(9.0+) and Safari(3.0+) support .mp4.
Ok, then the good thing is that you don’t need to ask your users to switch to a different browser in order to see your content. You can use a few alternatives to make sure that your users see your videos. We’ll get to those alternatives soon. For now, let’s see now how we can improve this video thing.
New to HTML5?
If you are new to HTML5, or if you want to improve your knowledge of it, then we highly suggest grabbing a copy of our HTML5 e-book which covers the basics of HTML5 and its elements!
Grab our HTML5 eBook now!
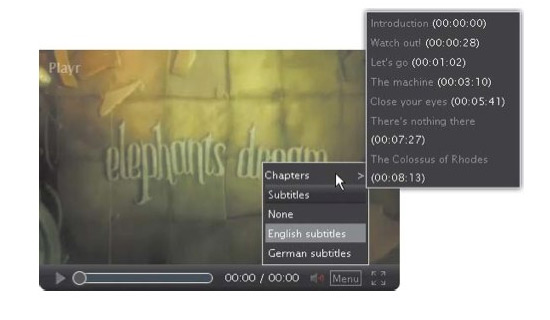
Pretty video players
Of course you don’t need to rely on default player controls for the video tag. Actually you can do seriously cool stuff (like applying CSS effects, canvas playing & more) with your video content on the fly, but we’ll see more about this soon.
Here’s how a custom video player is made. Dev.Opera has a great tutorial on this and we’ll outline a few things that you can do.
How this custom controls thing works
Once our video is loaded we’ll use jQuery to remove its default controls and append our own HTML controls on it. Then jQuery will control all attributes we need, like readyState (if video is being played), duration (so we can use a slider), currentTime (so we can show how much time has played), and volume controls.
After doing JS you’ll see that video controls can easily be themed and changed via CSS, as it should be at first place, right?

Source: Opera Tutorial
Ok, ok, let’s do it the smart way
We have a lot of plugins to help us in this process. Let’s see a couple of them:
WordPress Plugin – HTML5 and Flash Video Player

With it you can easily add videos the old flv way, or cool HTML5 with flash fallback, with shortcodes: [videoplayer file=”video/video.flv” /] or [videoplayer file=”video/video.mp4, ogg, webm” /]
Make an HTML5 video a background with jQuery.VideoBG plugin

Crazy thing! You can add a video to your background, and it gives a pretty cool look, indeed.
Good looking video player with ttwVideoPlayer jQuery Plugin

One of the bests video players I’ve even seen. It looks pretty good, and has nice features.
All in one solution with jPlayer

Take a look at their first demo and you’ll see that isn’t just another jQuery video plugin. It allows you to enhance the default players behaviors in ways that I can only imagine normally doing with flash. Circle player is pretty crazy, check it and see what I’m talking about!
One last good reference – Html5video.org

It has good insights about video tag, news section, players comparison.. well, good things to know about HTML5
Now let’s look at how you can learn faster and efficient.
How to Hack Web Design Learning Process
[firstwebdesigner_subscribe]
How Do You Hack Web Design Learning Process?
When you say hacks or life hacks, it’s usually about shortcuts or the easy way out. These are the tricks and techniques you use in everyday life to make things easier.
In education, however, there are simply no shortcuts. Or isn’t there?
There might not be in getting a degree in university, but there are techniques to gain necessary skills and education in web design that will be beneficial to your practice and business.
Tomas Laurinavicius, founder and editor-in-chief of Despreneur, tells his secret and his experience about learning web design, developing your skills, becoming at the top of your game, and entrepreneurship through self-study.
Theory and Practice
Tomas taught himself web design when he was in high school. Later, he invested more and got a formal education enrolling in classes which combine business and design. However, he found the classroom lessons boring and continue to self-taught himself by getting resources from the Web.
So which strategy really works? Or which path should you go?
Deciding whether to get formal education or learn by yourself is a choice which depends on your end goal.
For Tomas, his interest shifted on the business side of web design – he wanted to become self-employed doing his passion. And he have observed that learning the business side in the classroom isn’t enough because it doesn’t provide him the skills and experience he needs to become an entrepreneur.
On the other hand, if you want to aim for a top position in a big agency, getting formal education is a must. Once you’re there, however, you need to focus on a certain niche and become an expert on that.
On Charging Clients
One of the greatest dilemmas web designers face, especially if you are self-taught, is when to start charging clients.
The answer is simple – If you want to add value to yourself, you have to start charging unless you are doing a project for a non-profit.
But before reaching that place, self-discipline is a very essential element. You need to have discipline to develop certain skill sets and knowledge needed as a web designer.
Developing your creative thinking skills is also a must. You need to continuously see patterns in designs and reinvent them so it would become appealing to a certain culture or group.
On the other hand, if you want to focus on the entrepreneurial side of design, you also need to gain confidence by starting to work with real people and real clients. There would be mistakes but you learn how to communicate with them and get to solve their problem.
Getting Out of the Comfort Zone
Developing your self-confidence also means getting out of your comfort zone. One of the best way to stretch your self-confidence is to constantly put your work online. This exercise breaks the mindset that people might laugh at or criticize what you have place because you think it isn’t good enough.
Contrary to that, however, is that as much as there are people who don’t really care what you share online, there are also those who take notice.
Travel can also take you out of your comfort zone because it exposes you to cultures different than your own. It also forces you to talk to people and do things you don’t normally do.
Now it’s your turn!
So, have you ever used this? What do you think about?
Do you know about another tool that can help us and is missing here? Let us know!
This post may contain affiliate links. See our disclosure about affiliate links here.