Coding is a logical process. You want the site or program to do a particular thing. You enter in the commands needed to achieve that end.
Learning to develop websites could be approached just as logically. Languages for the computer could be compared to math classes. You need to learn simple addition before you can even think about calculus.
Going into it with the thought of languages building off each other might help you learn the languages more effectively. That’s why the answer to the question how to start coding lies in the logic and at the basic.
Your Designer Toolbox
Unlimited Downloads: 500,000+ Web Templates, Icon Sets, Themes & Design Assets

The basics
In the first section you will find what languages to learn first and the resources where to learn the basic knowledge of coding for the web.
Language 1–HTML
The first language you should tackle is obviously HTML. Short for HyperText Markup Language, this was the first language used on the web and as such is the backbone and framework for many other languages.
The syntax of HTML is relatively simple and straightforward and there are a number of books and online resources available to help you. Be aware of the dates of the resources, however, since some elements are no longer supported, especially since HTML5 is in the process of a release.
What I wish I had known: Make sure you close all your tags! I cannot count the times that a page displayed strangely because I forgot to close a div. In this, commenting may be your best option, especially if it’s only
<!-- This closes the Header Tag -->
It may save you a headache or two for HTML and will insure that you are in the habit of closing them for the stricter offshoots. A validation tool may become your best friend, so be sure to bookmark your favorite. I like W3C’s Markup Validator, but there are others out there, so check around.
Some Useful Resources:
- Web Monkey’s “Make an HTML Document”
- University of Texas at Austin’s “Learning HTML”–This is more a list of other useful sites, but still good
- W3Schools HTML Tutorial–very basic, but good if you are just starting out
- Web Reference’s Intro to HTML Basics
Offshoots: There are several other languages that branch off from HTML. This includes XHTML which tends to be more fussy about syntax—they don’t call it “strict” for nothing—but does have its uses.
Language 2–Cascading Style Sheets (CSS)
There’s a good reason I put CSS here. It builds directly off of HTML, but lets you stylize your website more efficiently than HTML by itself. Having a visually appealing website also is more encouraging to work on and more fun to show off.
CSS also brings to your attention the issue of cross-browser compatibility, the sometimes frustrating problem of web browsers handling the same code differently. Learning CSS will help you anticipate the different ways browsers handle the same code. Developing a mindset to deal with these hurtles also builds general troubleshooting capabilities, a necessary tool for real life, as well as web development.
Having ids and classes already built into your HTML from using CSS also makes it easier to incorporate JavaScript libraries, like jQuery, later on.
With CSS3, cascading style sheets now have more useful features than ever, including support for gradients and rounded corners. These can save you time and energy. The downside of this is that not all browsers support them.
What I wish I’d known: Internet Explorer is (arguably) the worst browser when it comes to cross-browser compatibility. Conditional comments work for IE5 and up, and make styling for IE a little easier. Here’s a fun way to use them in the head of an HTML document.
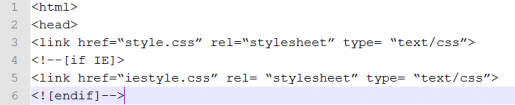
Only Internet Explorer will see the stylesheet contained within the conditional comments. Other browsers will only see a comment and ignore it. By putting the IE stylesheet second, you override any duplicate tags, so you only need to modify the elements that display incorrectly.
Some Useful Resources:
- 35 Websites to Teach You How To Use CSS Effectively–on 1stwebdesigner
- 53 CSS Techniques You Couldn’t Live Without
- The Principles of Cross-Browser CSS Coding
Language 3–JavaScript (JS)
JavaScript is useful for creating websites with dynamic or animated content. This includes animated transitions, menu tabs and near-flash like effects. JS introduces you to the wonders of, among other things, if and elseif statements.
These are actually very useful tools and appear in many forms of programming, including PHP.
The syntax for JS is less forgiving than HTML or CSS, but will give you a definite sign that you did something wrong. It won’t work! The frustrating bit is that it doesn’t necessarily tell you what is wrong, so you may spend hours searching for that missing semicolon.
What I wish I’d known: While there are proponents of first learning a JavaScript library—like MooTools or jQuery— I don’t think you are doing yourself a favor through this, having done this myself. This is because when it comes to certain things—like HTML5’s canvas function, for instance—you need to know how to make the whole thing work without the shortcuts that libraries provide, especially where calling variables are concerned.
Some Useful Resources:
- W3 Schools Javascript
- Web Reference’s Intro to JavaScript
- Tizag Javascript Tutorial
- Improve Your Skills: jQuery Beginner Tutorials Roundup
Offshoots:Depending on your need for dynamic content, AJAX (Asynchronous JavaScript and XML) may be something you want to learn as well. It isn’t its own language, but a way of combining the two languages for more dynamic functionality. Obviously, this requires a knowledge of both JavaScript and XML.
Language 4—PHP
PHP can be used to create dynamic websites, either on HTML pages or on sites run on a content management system (CMS) like WordPress. The conditional statements, like “if”, “elseif” and “else”,are similar to those used in Javascript.
Unlike the already mentioned web development languages, PHP runs server-side, which has its own set of benefits and challenges. One benefit is that, unlike JavaScript, the user does not have to have PHP installed on their system in order to correctly view the page.
The downside of this is that your host server does have to support PHP, though this is becoming less of an issue. The other part of this is that you do need a local server to run PHP pages.
What I wish I’d known:Parse errors can be helpful. These point to the direct line number with the syntax error, which can save you time.
Some Useful Resources:
- PHP.net Tutorial
- Learn PHP–About.com
- PHP: What You Need to Know to Play with the Web
Continuing your learning
These are the core languages that will get you the most mileage. While there are other languages used in web development, HTML, CSS, JavaScript and PHP can provide a foundation for you to bridge off of. The Internet itself offers many resources that can help you learn coding or refresh your knowledge.
Don’t forget to see even more courses that can teach you how to code the right way.
This post may contain affiliate links. See our disclosure about affiliate links here.