Flat design is dominating the web, and I’m sure you all know that recently Apple created a new look for their OS. I love the minimal appearance of the user interface, and I know Apple fans are eagerly waiting to test the new iOS operating system this fall.
So, while we’re waiting, I’m going to show you how to create a countdown timer in Adobe Photoshop. The look and the color scheme is based on the iOS wallpapers that have been recently released.
This tutorial will be quick, and beginners will find this tutorial helpful in understanding the power of Free Transform.
Unlimited Downloads: 500,000+ Fonts, Web Templates, Themes & Design Assets

Video Tutorial
And in case you prefer to do it the rough way, here’s a text and screenshot combo tutorial for you!
Step 1
Create a new document in Photoshop 730px by 410px and then let’s create guidelines by just dragging some guides from the Ruler Tool and placing them at the center of the canvas horizontally and vertically.
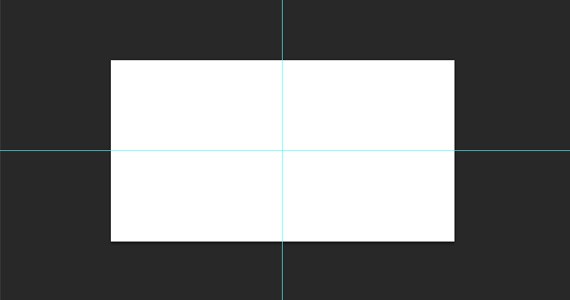
Step 2
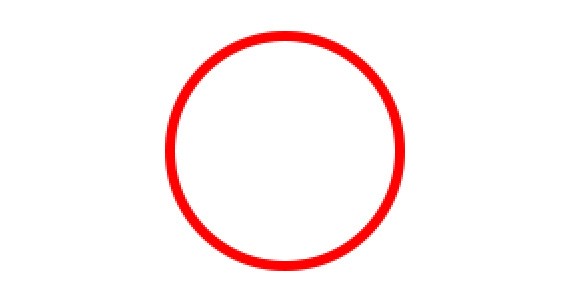
Using the Ellipse Tool (U) create a 120px by 120px shape and place it in the center. Hide the fill layer and a stroke of 5px, color to #e1e1e1.


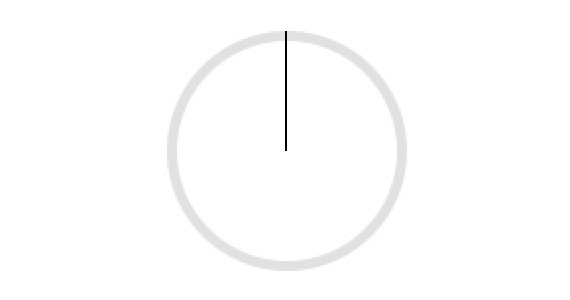
Step 3
Zoom in about 1200% and create a 1px line using the Line Tool (U) starting from the top edge of the circle down to the middle.
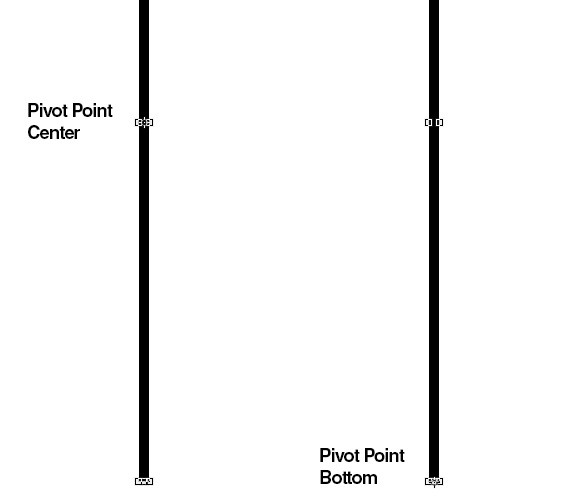
Step 4
Press Ctrl + Alt + T on the keyboard and you will see a transform control. See that Pivot Point (something like the crosshair of a sniper) on the center of the line? Let’s move that to the bottom edge of the line by holding the Alt key on the keyboard and clicking and dragging it to the very bottom.
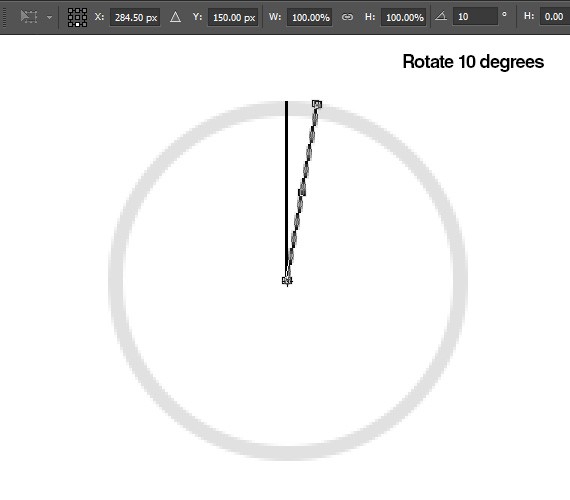
Step 5
Don’t press enter yet. While the transform control is still there change the value of the Rotation to 10 degrees and press enter twice.
Step 6
Now press Shift + Ctrl + Alt + T on the keyboard, what this does is copy what we did in Step 5. Just continue pressing the keys until you have a spiral line shape.
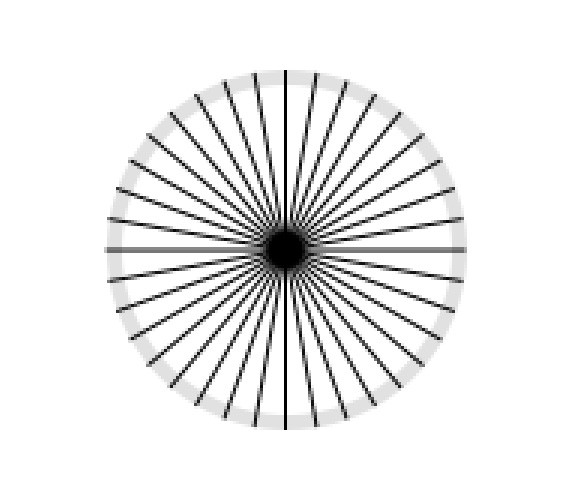
Then change the color to white.

Step 7
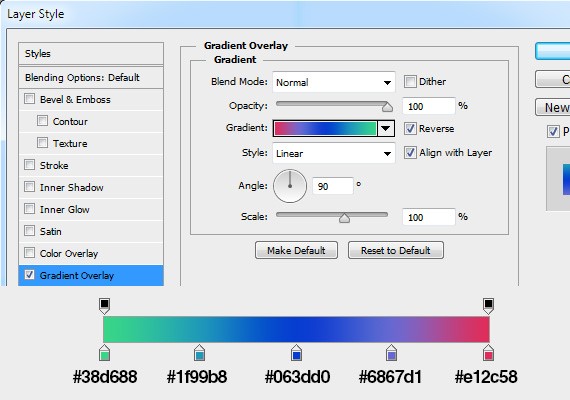
Duplicate the base first/base shape that we’ve created and placed it at the very top of the layers panel. This will serve as the rotation indicator.
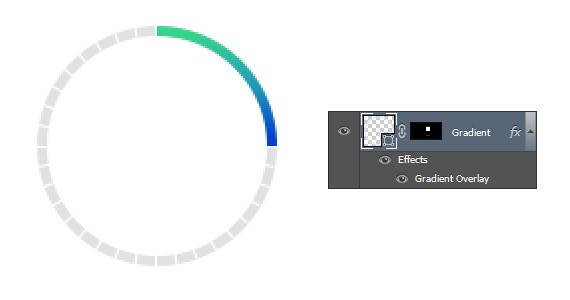
Apply this gradient overlay.
Step 8
Mask the part you want to hide and make sure it matches with the desired day, time, min, sec that we will put it.
Step 9
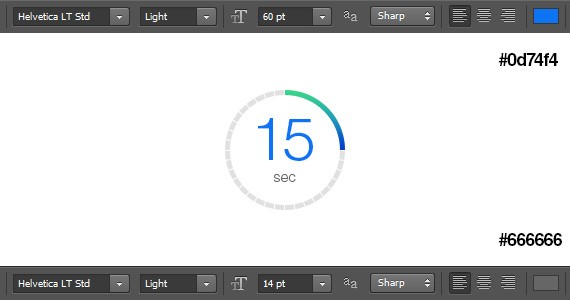
Using the Text Tool (T) add a number for the desired day, time, min, sec and add the right label to it.
Final Step
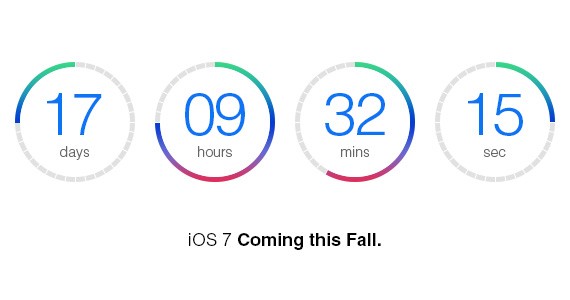
Group the layers that we’ve created and duplicate it four times and align them horizontally by adding a 20px gap between each timer.
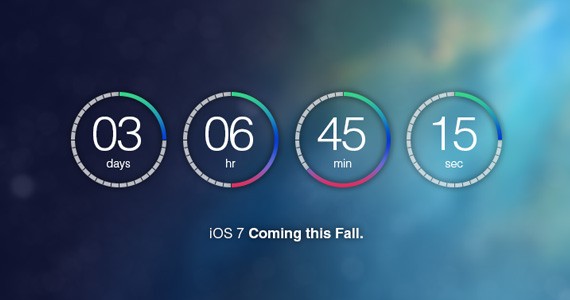
Look what I did here. With the timer that we’ve created, I put an iOS7 wallpaper and blurred it about 15%. Then I played with the layer mask to hide the unnecessary parts, added some drop shadows and Boom! I came up with the image you see below.
It’s a challenge for you to take this tutorial and go to the next level by just playing with a layer mask and adding touches to make it look impressive, yet still minimal.
That’s it, guys! I hope you learned something from this tutorial. It would be awesome if you shared your results below. If you have questions, feel free to drop them below. I would love to hear your thoughts and I am willing to answer your questions. I’ll catch you guys in the comments.
This post may contain affiliate links. See our disclosure about affiliate links here.