The design of a website plays a major role in attracting visitors on a consistent basis. Interactive designs get more attention compared to the plain old static designs.
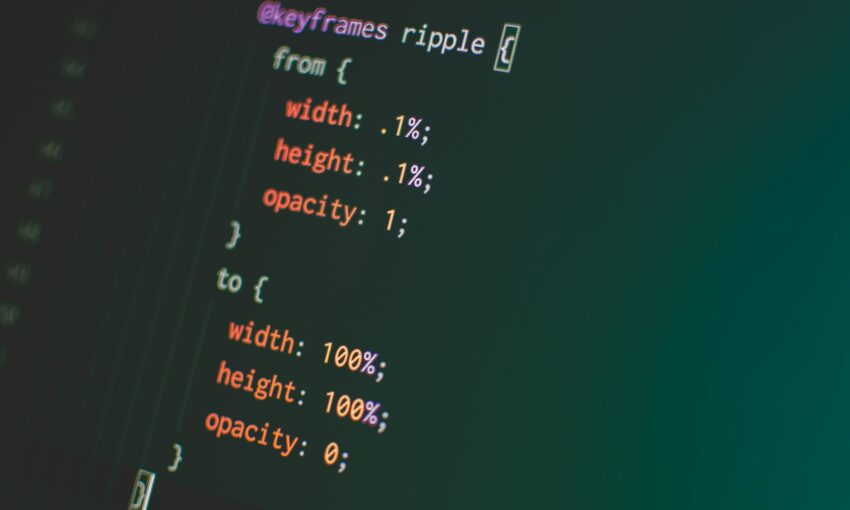
Technology is improving at a rapid pace to cater the advanced modern web designs. As a result, CSS3 offers the animations without the help of JavaScript. Even though CSS3 and HTML5 are improving in leaps and bounds, jQuery seems to be the popular choice for creating interactive designs.
Let’s get started!
Your Designer Toolbox
Unlimited Downloads: 500,000+ Web Templates, Icon Sets, Themes & Design Assets

Practical Usage of jQuery Animation
jQuery has been used widely for designing interactive elements such as sliders, menus, scrollers and so on. Before we start the animation aspects, I suggest you to have a look at the following practical implementations, which illustrates the power of jQuery animations.
As a beginner, you can’t just jump into the types of designs illustrated in the preceding section. So here we are going to cover the basics of jQuery animations from the beginner’s perspective.
Introduction to jQuery Basic Animation
Most designers have the knowledge of working with basic jQuery or JavaScript codes. Changing the visibility of an element is a common task that is included in almost every website design. We can just hide/show the element using CSS display or visibility attributes. jQuery simplifies the process by introducing two functions called hide and show. Consider the following code for showing and hiding an HTML element.
$("#panel").show();

$("#panel").hide();
With the preceding code, the element appears and disappears in a very limited time range. Use this jsFiddle link to see a demo of the preceding code in action.
Ideally, we should smoothen the process of hiding and showing elements using animations to provide better user experience. jQuery provides two built-in techniques for showing and hiding elements with simple animation effect.
- Fading – Integrates a fading motion into HTML elements by changing the element’s opacity.
- Sliding – Integrates a sliding motion into HTML elements by changing the element’s height.
Let’s see how to use the above techniques to show and hide the elements with an animated effect.
jQuery encapsulates the complexity of animations by providing built-in methods to cater various tasks in web design.
Fading
Fading is mainly provided by the functions called fadeIn and fadeOut. Opacity of the element is increased by the fadeIn function and decreased by the fadeOut function. We can also pass the time interval for fading as shown in the following code.
$("#panel").fadeIn("slow");

$("#panel").fadeOut("fast");
We have the option of choosing slow or fast as the predefined values for the time interval . Also,we can pass the number in milliseconds to define the duration of animation. Here is the jsFiddle demo for working with fadeIn and fadeOut functions.
Sliding
Sliding functions change the height of the element instead of opacity for animating elements. Functions and syntaxes work exactly similar to fading, where slideUp is used for hiding and slideDown is used for showing elements. Following code previews the basic usage of sliding functions.
$("#panel").slideDown("slow");

$("#panel").slideUp("fast");
Duration parameter also works similar to the usage of fading functions. Here, you can see the actual beginning of the animations by moving the element. Consider the following URL for a demo usage of sliding functions.
Getting Started with jQuery Animate Function
Most beginners will think that building animations is a quite complex task. Definitely it’s difficult if you are doing it from scratch. jQuery encapsulates all the complexity by providing a single standalone function, which handles any type of animation. Basically, the animations will be created by altering the values of the CSS attributes. Once you get used to the jQuery animate function, building complex animations will become a simple task. Let’s get started by looking at the basic syntax of animate function.
$( "#panel" ).animate({

  // CSS Properties and values

}, 5000, "linear", function() {

  // Completion Handler

});
Preceding code illustrates the syntax for using the animate function. The first parameter contains all the CSS properties and values. The next optional parameter defines the duration of the animation. The third parameter defines the easing( animation type) and the final parameter defines an anonymous function for handling animation completion. Having looked at the basic usage, we can move into creating something practical with jQuery animations.
Animating Image Parts
In this section, we are going to look at how we can display an image by animating image parts. First, we have to split an image into smaller images. You can use the technique provided in my tutorial on Create Jigsaw Puzzle Using jQuery and PHP for splitting images.
Here, is the image that we are going to use for animation.

Inside the source codes, you will find 12 images generated by splitting the preceding image. Each image will have the dimensions of 150px x 150px. Sub images are divided into 2 rows of 6 blocks. Then all the 6 blocks of each row will be positioned in the right hand corner of the page using the following code.
<div id="img_panel">


<div class="img_item"><img src="1.jpg" /></div>


<div class="img_item"><img src="2.jpg" /></div>


<div class="img_item"><img src="3.jpg" /></div>


<div class="img_item"><img src="4.jpg" /></div>


<div class="img_item"><img src="5.jpg" /></div>


<div class="img_item"><img src="6.jpg" /></div>


<div class="img_item2"><img src="7.jpg" /></div>


<div class="img_item2"><img src="8.jpg" /></div>


<div class="img_item2"><img src="9.jpg" /></div>


<div class="img_item2"><img src="10.jpg" /></div>


<div class="img_item2"><img src="11.jpg" /></div>


<div class="img_item2"><img src="12.jpg" /></div>


</div>
Here, we have separated 12 images into 2 columns using two CSS classes called img_item and img_item2. Now let’s look at the CSS code for positioning images.
.img_item{

       position: absolute;

       right: 0px;

       opacity:0;

       top :0;

    }

    .img_item2{

       position: absolute;

       right: 0px;

       opacity:0;

       top:150px;

    }
According to the above code, all the images of each row will be hidden and positioned on top of each other using absolute positioning. Now we can look at the jQuery code for generating the image through animations.
$(document).ready(function(){

   var left = 0;

 $(".img_item").each(function(i,val){

           $(this).animate({

               left: left,

               opacity: 1

           }, 1500 );

           left += 150;

   });

   left = 0;

 $(".img_item2").each(function(i,val){

           $(this).animate({

               left: left,

               opacity: 1

           }, 1500 );

           left += 150;

       });

    });
First, we have two selection statements for filtering img_item and img_item2 class items. Then we execute the animate function on the individual elements to convert opacity to 1 and left positioning relative to the preceding image part. Basically, all the image parts will start the animation at the same time providing an output similar to the following image.
We can use similar effects inside sliders, splash screens, image galleries.
Now you know the basics of working with animate function. Let’s dig deeper into the animation aspects by looking at advanced configurations.
Designing Sequential Animations
In the preceding scenario, all the elements started animating immediately on page load. But sometimes we want sequential animations, where animation of each element starts after the completion of preceding element. So here we are going to load the same image using sequential animations. Let’s start by defining the HTML code.
<div id="img_panel">


<div class="img_item"><img src="1.jpg" /></div>


<div class="img_item"><img src="2.jpg" /></div>


<div class="img_item"><img src="3.jpg" /></div>


<div class="img_item"><img src="4.jpg" /></div>


<div class="img_item"><img src="5.jpg" /></div>


<div class="img_item"><img src="6.jpg" /></div>


<div class="img_item"><img src="7.jpg" /></div>


<div class="img_item"><img src="8.jpg" /></div>


<div class="img_item"><img src="9.jpg" /></div>


<div class="img_item"><img src="10.jpg" /></div>


<div class="img_item"><img src="11.jpg" /></div>


<div class="img_item"><img src="12.jpg" /></div>


</div>
The only change from the previous code is the use of single CSS class instead of two classes for rows. This implementation will generate the rows from jQuery code instead of hard coding using CSS classes. The CSS code for this implementation will be same as the code used for the previous example. Now let’s look at the jQuery code for sequential animation.
$(document).ready(function(){

       var left = 0;

       var items = $(".img_item");

       animateImg(items,0,0,0);

    });
Once the page is loaded, we get all the image elements using img_item class. Then we pass the items into a function called animateImg for processing animations. The following code provides the implementation of animateImg function.
var indexNum = 1;

 var animateImg = function(items,left,height,indexNum){

 if(items.length >= indexNum){

           var item = items.get(indexNum);

           $(item).animate({

               left: left,

               top : height,

               opacity: 1

           }, 1500 ,function() {

               left += 150;

               indexNum++;

               if(indexNum  % 6 == 0){

                   left = 0;

                   height += 150;

               }

 animateImg(items,left,height,indexNum);

           });

       }

    };
The animateImg function uses four parameters for providing its functionality. The first parameter defines the collection of image items. The second and third parameters define the left and top values of the screen. Initially these 2 values will be set to 0 to start the image from the top left corner of the screen. The fourth parameter is the index number of image for separating them into rows.
First, we check whether we have reached the end of the items array by using an if condition. Then we get the image at the given index number from the items array. Then we call the animate function with a duration of 1500 milliseconds. Next, we increase the index number to get the next element from items array.
In this scenario, we have 2 rows with 6 images each. So we take the module of the index number to check whether we have reached an end of a row. If so, we increase the top value of the image to dynamically create rows. Finally, we call the animateImg function in a recursive manner to traverse through all the elements and generate the complete animation. The following image previews the sequential animation for this scenario.

As you can see, we have used the animation complete function to execute the animation on the next element. So each animation will start after the preceding one is completed. We can achieve similar functionality with queue functionality of the animate function.
Chaining Animations
Up to this point, we created single animations on each element. In complex scenarios, we need to chain multiple animations on a single element. So let’s modify the preceding example to chain animations.
var animateImg = function(items,left,height,indexNum){

 if(items.length >= indexNum){

           var item = items.get(indexNum);

           $(item).animate({

               left: left,

               top : height,

               opacity: 1

           }, 1500 ,function() {

               left += 150;

               indexNum++;

               if(indexNum  % 6 == 0){

                   left = 0;

                   height += 150;

               }

               console.log(items);

 animateImg(items,left,height,indexNum);

           }).animate({ left:left+150}, 1500);

       }

    };
We can chain animations on elements by calling the animate function multiple times using the dot notation. In the preceding code, we have started another animation after the first animation using .animate function. We can add any number of animations using this technique.
Wrap Up
In this tutorial, we explored the possibilities of building animations with jQuery animate function. We have looked at various practical techniques when animating the parts of an image to generate the complete image. Now you can continue researching about the things mentioned in the following list for enhancing jQuery animations.
- Animations queueing
- Handling animation progress
- Handling animation steps
Hope you take time to build some amazing animations as we listed in the beginning of this tutorial. Feel free to share and discuss about them using the comments section.
This post may contain affiliate links. See our disclosure about affiliate links here.