In the past few years the letterpress text effect has become a huge trend in web design. It’s being used in headers, headlines, and even interfaces.
The love for the letterpress effect has been transferred from printing machines to our computer screens. If done right letterpress can be a splendid and neat accent in your design.
Your Designer Toolbox
Unlimited Downloads: 500,000+ Web Templates, Icon Sets, Themes & Design Assets

Another superb, yet often underrated, text effect is embossing. You may have seen it in some menus, though. Text embossing is another effect which digital art has borrowed from traditional design.
We will be using some basic layer styles together with some more advanced techniques. If you’re a beginner in Photoshop text effects, continue to read to find out how to achieve fantastic looking letterpress and embossed text effects in Photoshop.
24,500+ Photoshop Actions, Photoshop Brushes, Print Templates and Fonts are now available for just $29 per month with Envato Elements
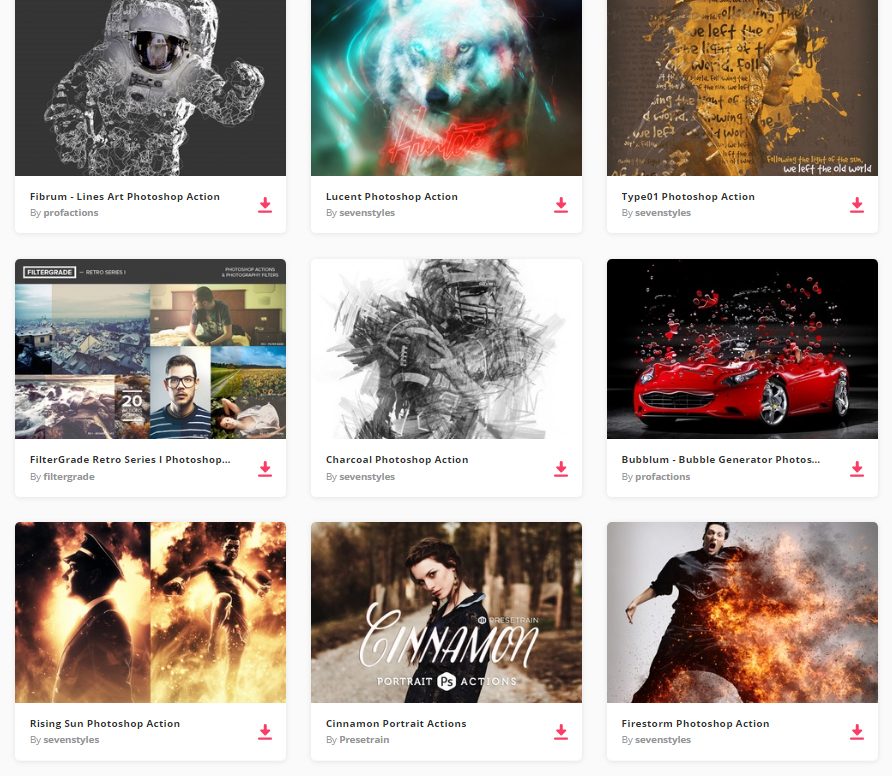
By joining Envato Elements you gain access to plenty of Photoshop Actions, as well as many other useful design elements. All of this is available for a single monthly subscription to Envato Elements. Join today, and gain access to a massive and growing library of 24,500+ creative assets with unlimited downloads.
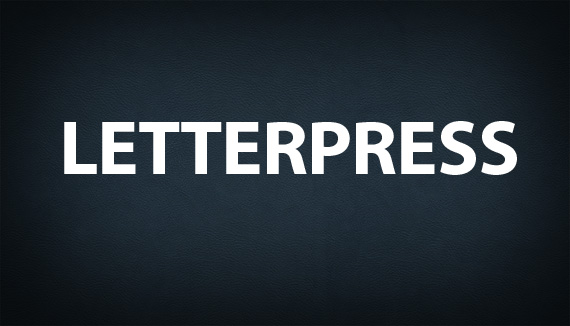
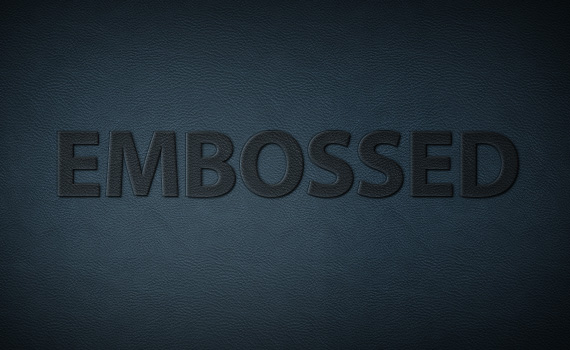
Final Image Of Emboss Photoshop Text And Letterpress Effect
(click on the image to view full-size version)


Background
Having the perfect background when using a letterpress or embossed text effect is very important. The right background can seriously enhance the overall look and make it more realistic. For letterpress and embossed text we want the background to be lighter than the text itself. So lets begin.
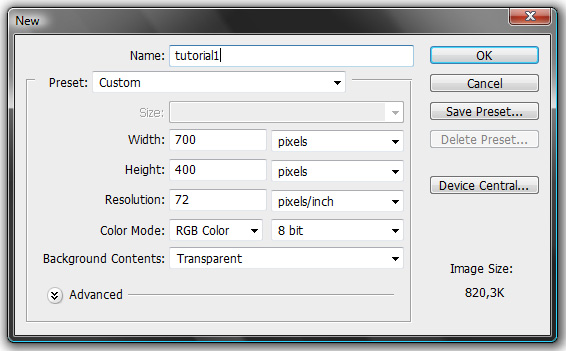
1. Create a new document
Start by creating a new document. Dimensions I used are 700×400 with dpi set to 72 pixels/inch.
2. Solid color
Grab the Paint Bucket Tool (G) and fill the layer with #30485a.

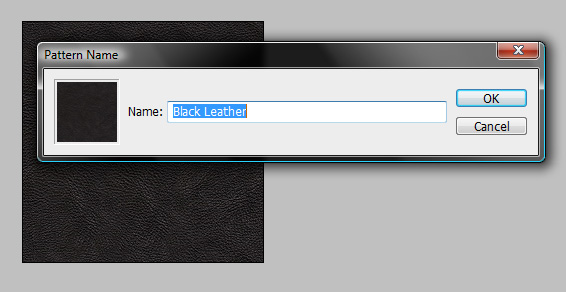
3. Adding texture
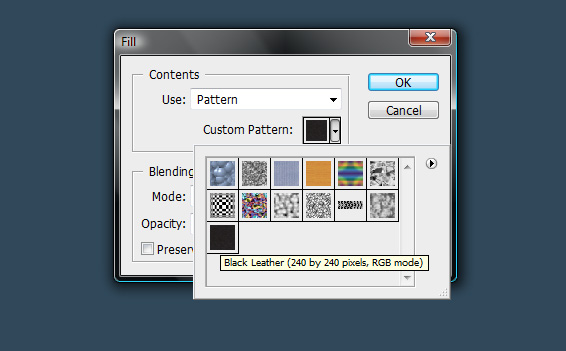
Download this Black Leather Pattern and open it up in Photoshop. There’s no need to download the original size image since we are going to define a pattern from this. I downloaded the 240×240 version. Once you’ve opened the pattern in Photoshop, go to Edit – Define Pattern and click ok.
Head back to your document and create a new layer. Go to Edit – Fill – Pattern and choose the pattern you just created.
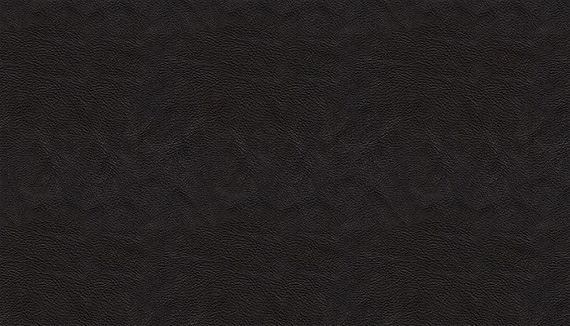
Set layer’s Blending Mode to Overlay and Opacity to 55%.

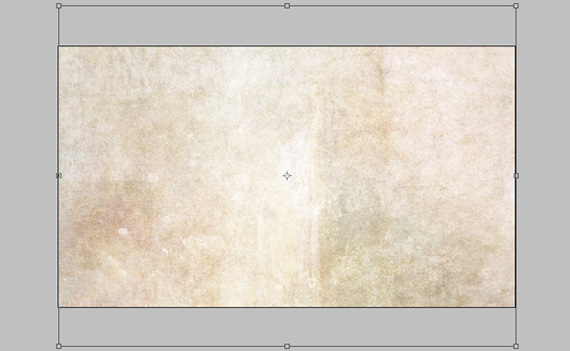
Download this Subtle Grunge texture and paste it into your document. Hit Ctrl+T and adjust it so it fits your document.
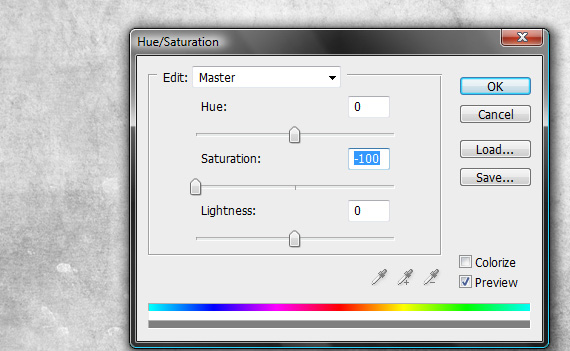
Go to Layer – New Adjustment Layer – Hue/Saturation (Ctrl+U) and drag the Saturation slider to the very left.
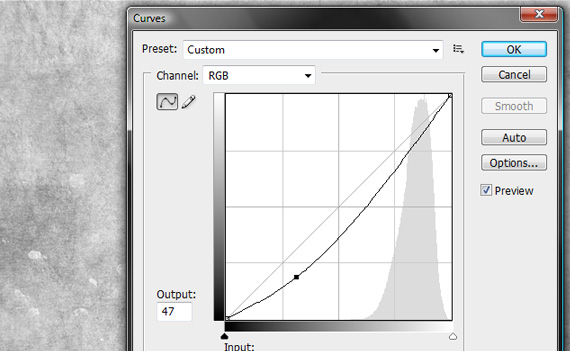
Then again go to Layer – New Adjustment Layer – Curves (Ctrl+M) and drag the lower part of the curve down a bit.
Set layer’s Blending Mode to Soft Light and Opacity to 15%.

4. Darkening Corners
Now select the Brush Tool (B) and choose a large soft brush with around 150px size and hardness set to 0%. Hit D on your keyboard to set the foreground color to black and background color to white. Holding Shift brush around the edges.

Now increase the brush size and brush the corners carefully to make a nice rounded frame.

Got to Filter – Blur – Gaussian Blur and set its radius to around 55 pixels depending on your document size. If necessary adjust your layer’s Opacity. I set my to 75%.

And you’re done with the background. To unite the layers click on the top one, hold Shift + Ctrl and click on the bottom layer. Then click Ctrl + G to group them.

Letterpress effect
Select the Type Tool (T) and type in your text. I used a font called Myriad Pro, set to Bold, 95pt size, Spacing -10 pt. After you’ve typed your text do a right click on the layer and click Rasterize Type.
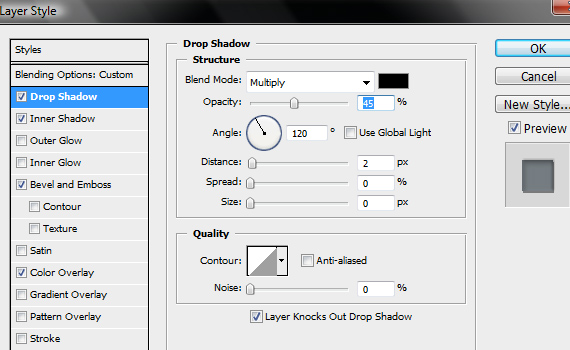
There are various ways to create the letterpress effect. I’m going to teach you the easiest and quickest way, in my opinion. Do a right click on your text layer and select Blending Options. Then apply the following Layer Styles.
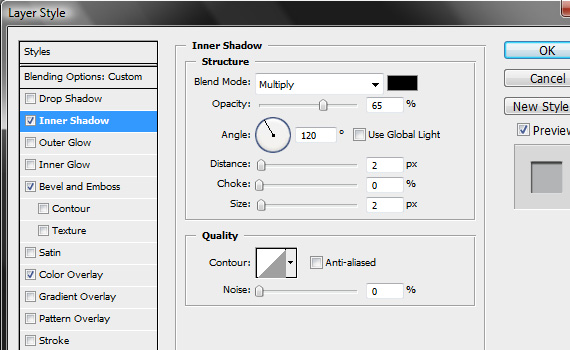
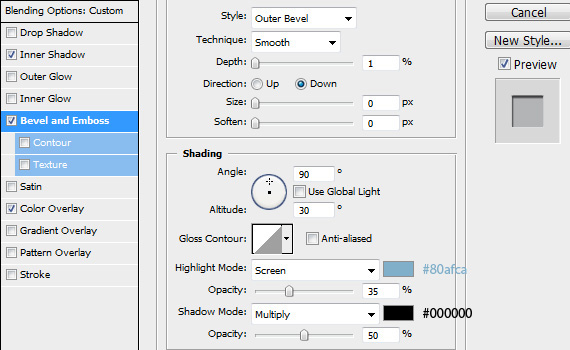
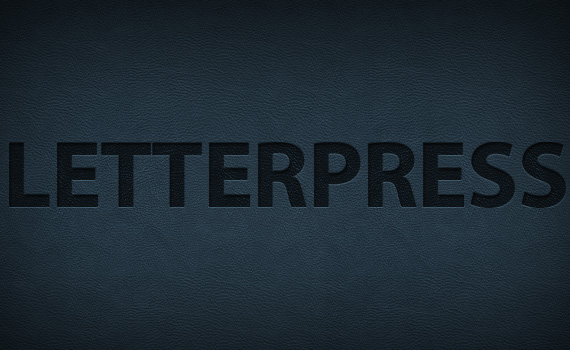
These are the Styles which worked fine for me. You may want to twiddle with the settings that so that it looks right. Your text layer should look similar to this one.
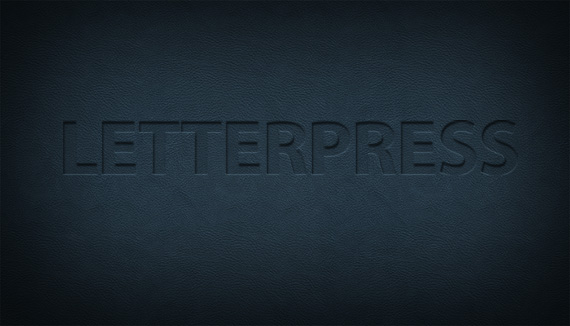
Not looking quite like a letterpress effect, right? But we’re going to fix that. Do a Ctrl + click on your text layer. A selection should appear.
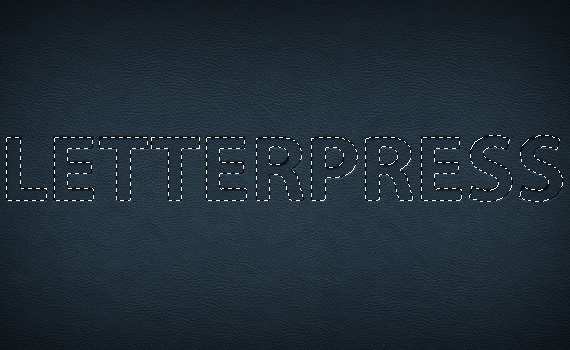
Still with the active selection head to your Background group and find the black leather pattern layer.
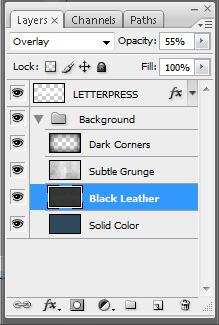
Select it and hit Ctrl + J. A new layer should spring up.
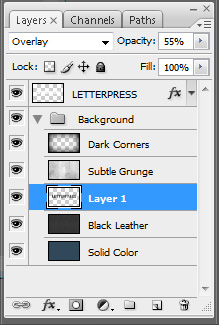
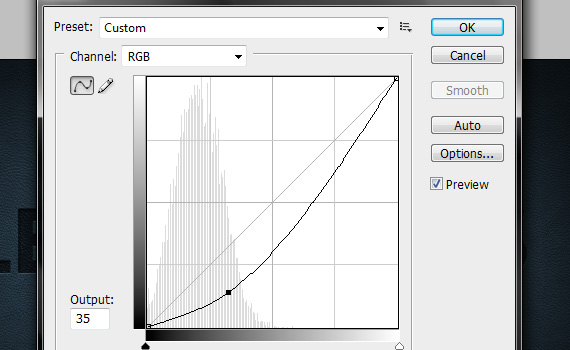
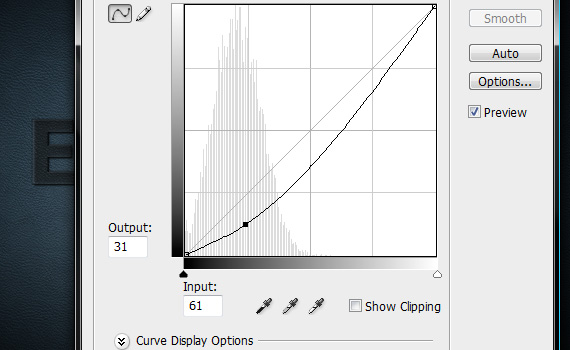
Bring that layer’s opacity up to 85%. Then go to Image – Adjustments – Curves (Ctrl+M) and drag the lower part of the curve down a bit.
With that done, your letterpress effect now should look much more realistic.
For the final step lets add subtle lighting to our image. Grab the Gradient Tool (G), hit D and X on the keyboard to set white as a foreground color and black as a background color. Choose Radial Gradient and draw something like this.

Set the layer’s Blending Mode to Soft Light and Opacity to 45%. Congratulations, you’re done with the letterpress effect. Click on the image to view the full-size version.
Embossed effect
We’re going to create the embossed text effect on the same background. So delete your letterpress text layer and the one you substracted from black leather pattern and do a Save As. You should have a fresh background with smooth lighting on it.

Again start by typing your text. I used the same bold Myriad Pro with 95pt size and -10 Spacing. After you’ve typed your text rasterize the layer.

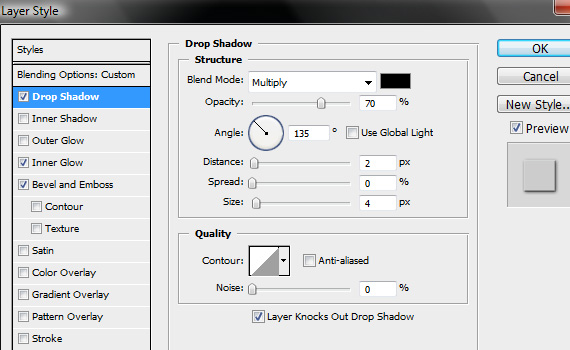
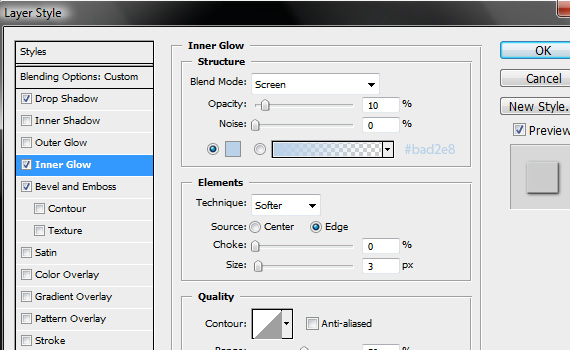
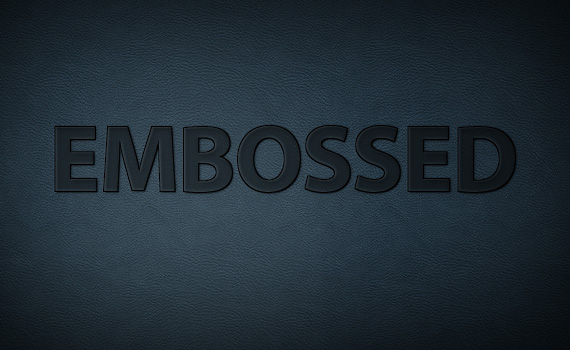
Now apply the following Layer Styles to your text layer.
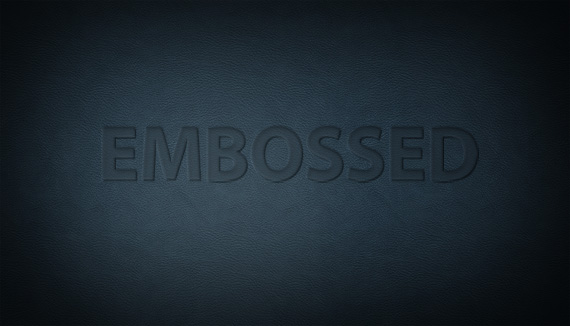
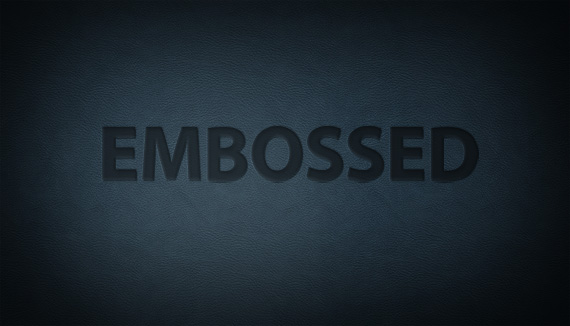
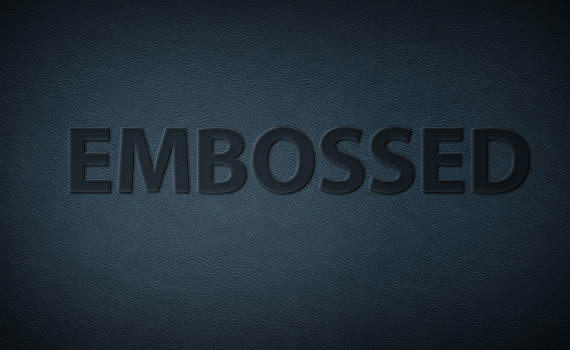
Your text layer should look similar to this one.
Now just like with the letterpress effect do a Ctrl + click on your text layer, select the black leather pattern and hit Ctrl + J. Name the new embossed2. Bring layer’s Opacity up to 100%. Go to Image – Adjustments – Curves (Ctrl + M) and drag the lower part of the curve down.
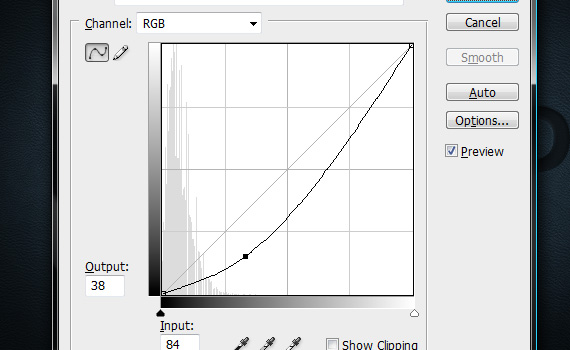
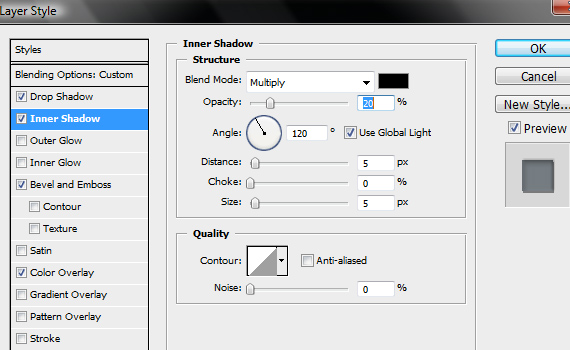
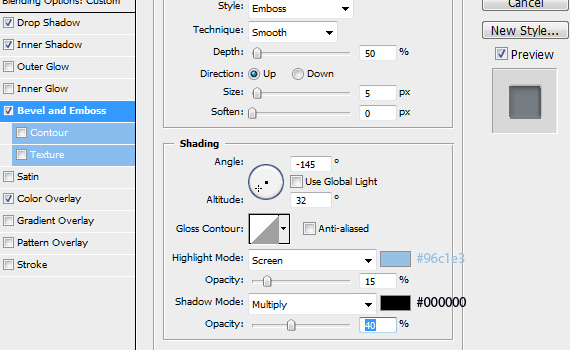
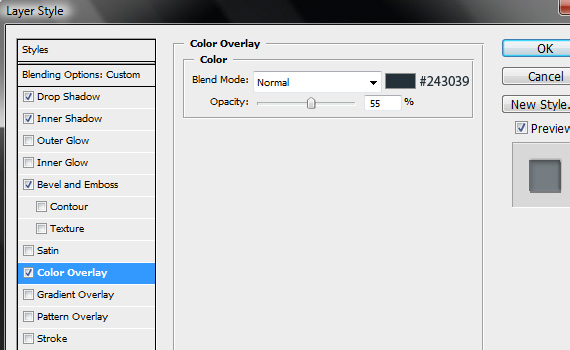
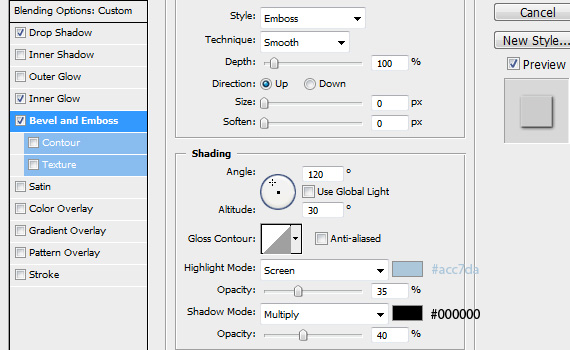
Now apply these Layer Styles to the embossed2 layer.
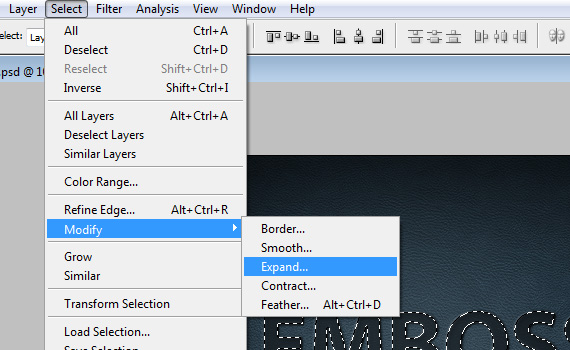
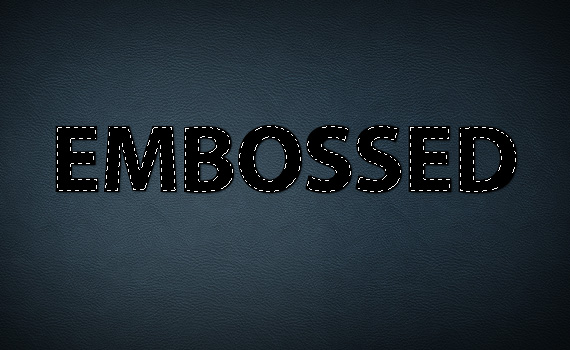
Now do a Ctrl + Click on your original text layer. Then go to Select – Modify – Expand, enter 1 pixel and click ok.

When that’s done create a new layer and grab Paint Bucket Tool (G). Set the foreground color to black and fill the new selection. Name the layer stroke.
Do a Ctrl + click on your original text layer to select it. Then select the stroke layer and hit delete on your keyboard.
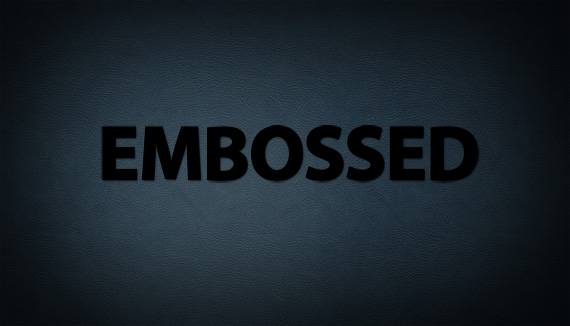
Select the stroke layer and hit your left arrow key once. Then set the layer’s opacity to 45%. That should give you a neat emphasizing stroke around your text.
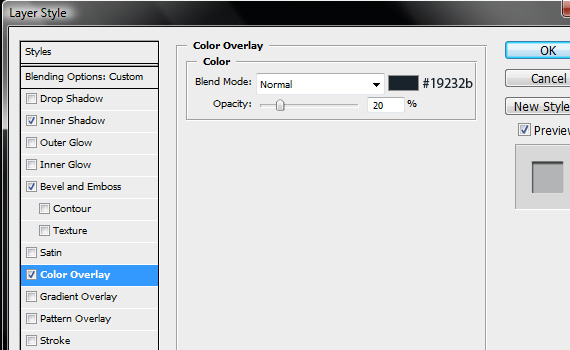
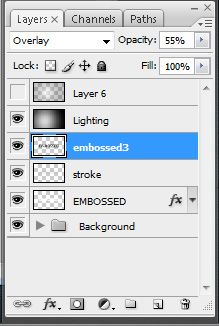
For the final touches select your original text layer again and do a Ctrl + click to load a selection from. Locate your black leather pattern and click Ctrl + J. Name the layer embossed 3 and drag it above the stroke layer.
Firstly, set the layer to Normal and lower the Opacity to 20%.
Then go to Image – Adjustments – Curves (Ctrl + M) and drag the lower part of the curve down a bit.
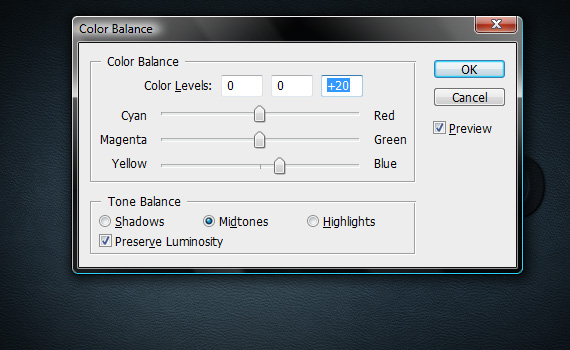
After that go to Image – Adjustments – Color Balance (Ctrl + B) and in Midtones set the balance to +20 for Blue tones.
To finish up lets add a bit more lighting to our image. To do that go to Edit – Fill and choose 50% grey. Set layer’s Blending Mode to Overlay. Then grab Burn Tool (O) with large soft brush set to Midtones and Exposure set to around 30%. Then just brush around the center. If you’d switch layer’s Blending Mode to Normal you should see something like this.

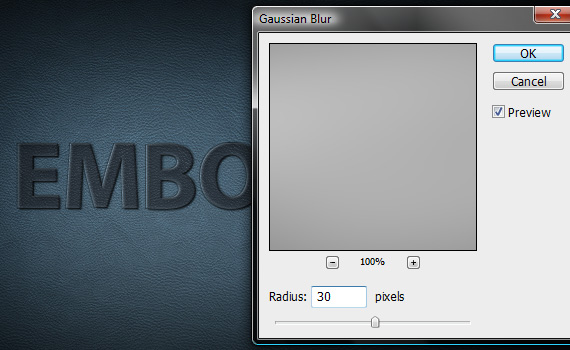
Set layer back to Overlay and go to Filter – Blur – Gaussian Blur and set it’s radius to around 30 pixels.
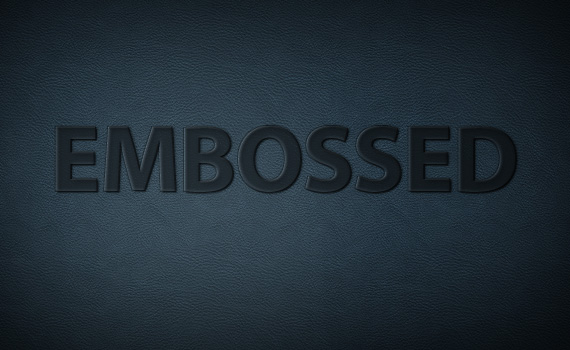
And that’s about it with the embossed text effect. Click on the image to view a full-size version.
I hope you enjoyed this tutorial on creating letterpress and embossed text effects in Photoshop. Of course this is not the only way to create the effect, Photoshop is full of possibilities you just have to experiment. You just have to imagine how would the effect look in real life and then it’s up to you how you achieve it. Feel free to make suggestions and ask questions if something wasn’t clear to you.
Here is the PSD file for you, if you want to compare your outcome with ours!
Just in case, this text tutorial wasnt understandable..which it shouldnt. I found another third party letterpress video tutorial that you can watch as alternative!
I am thinking about you!! :)
Cool, share your results and improvements!! :)
This post may contain affiliate links. See our disclosure about affiliate links here.